Introduction
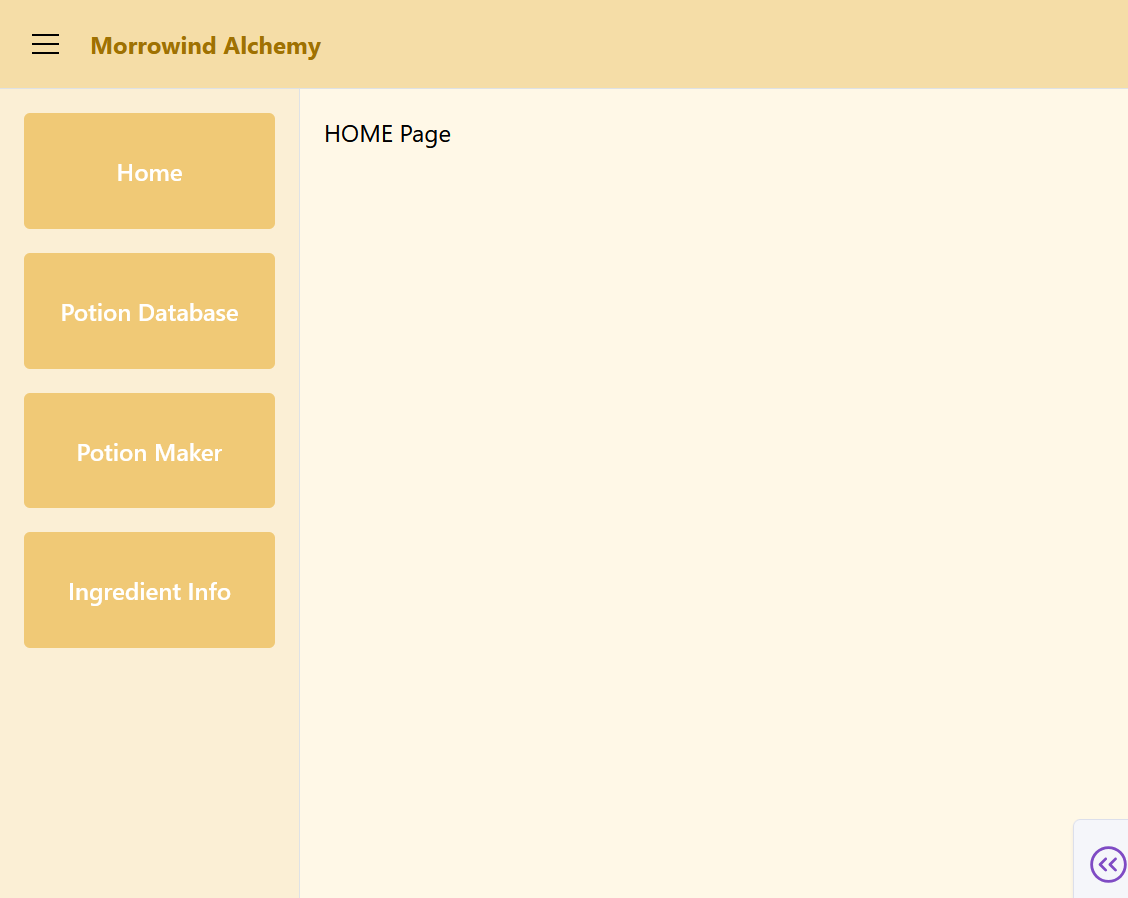
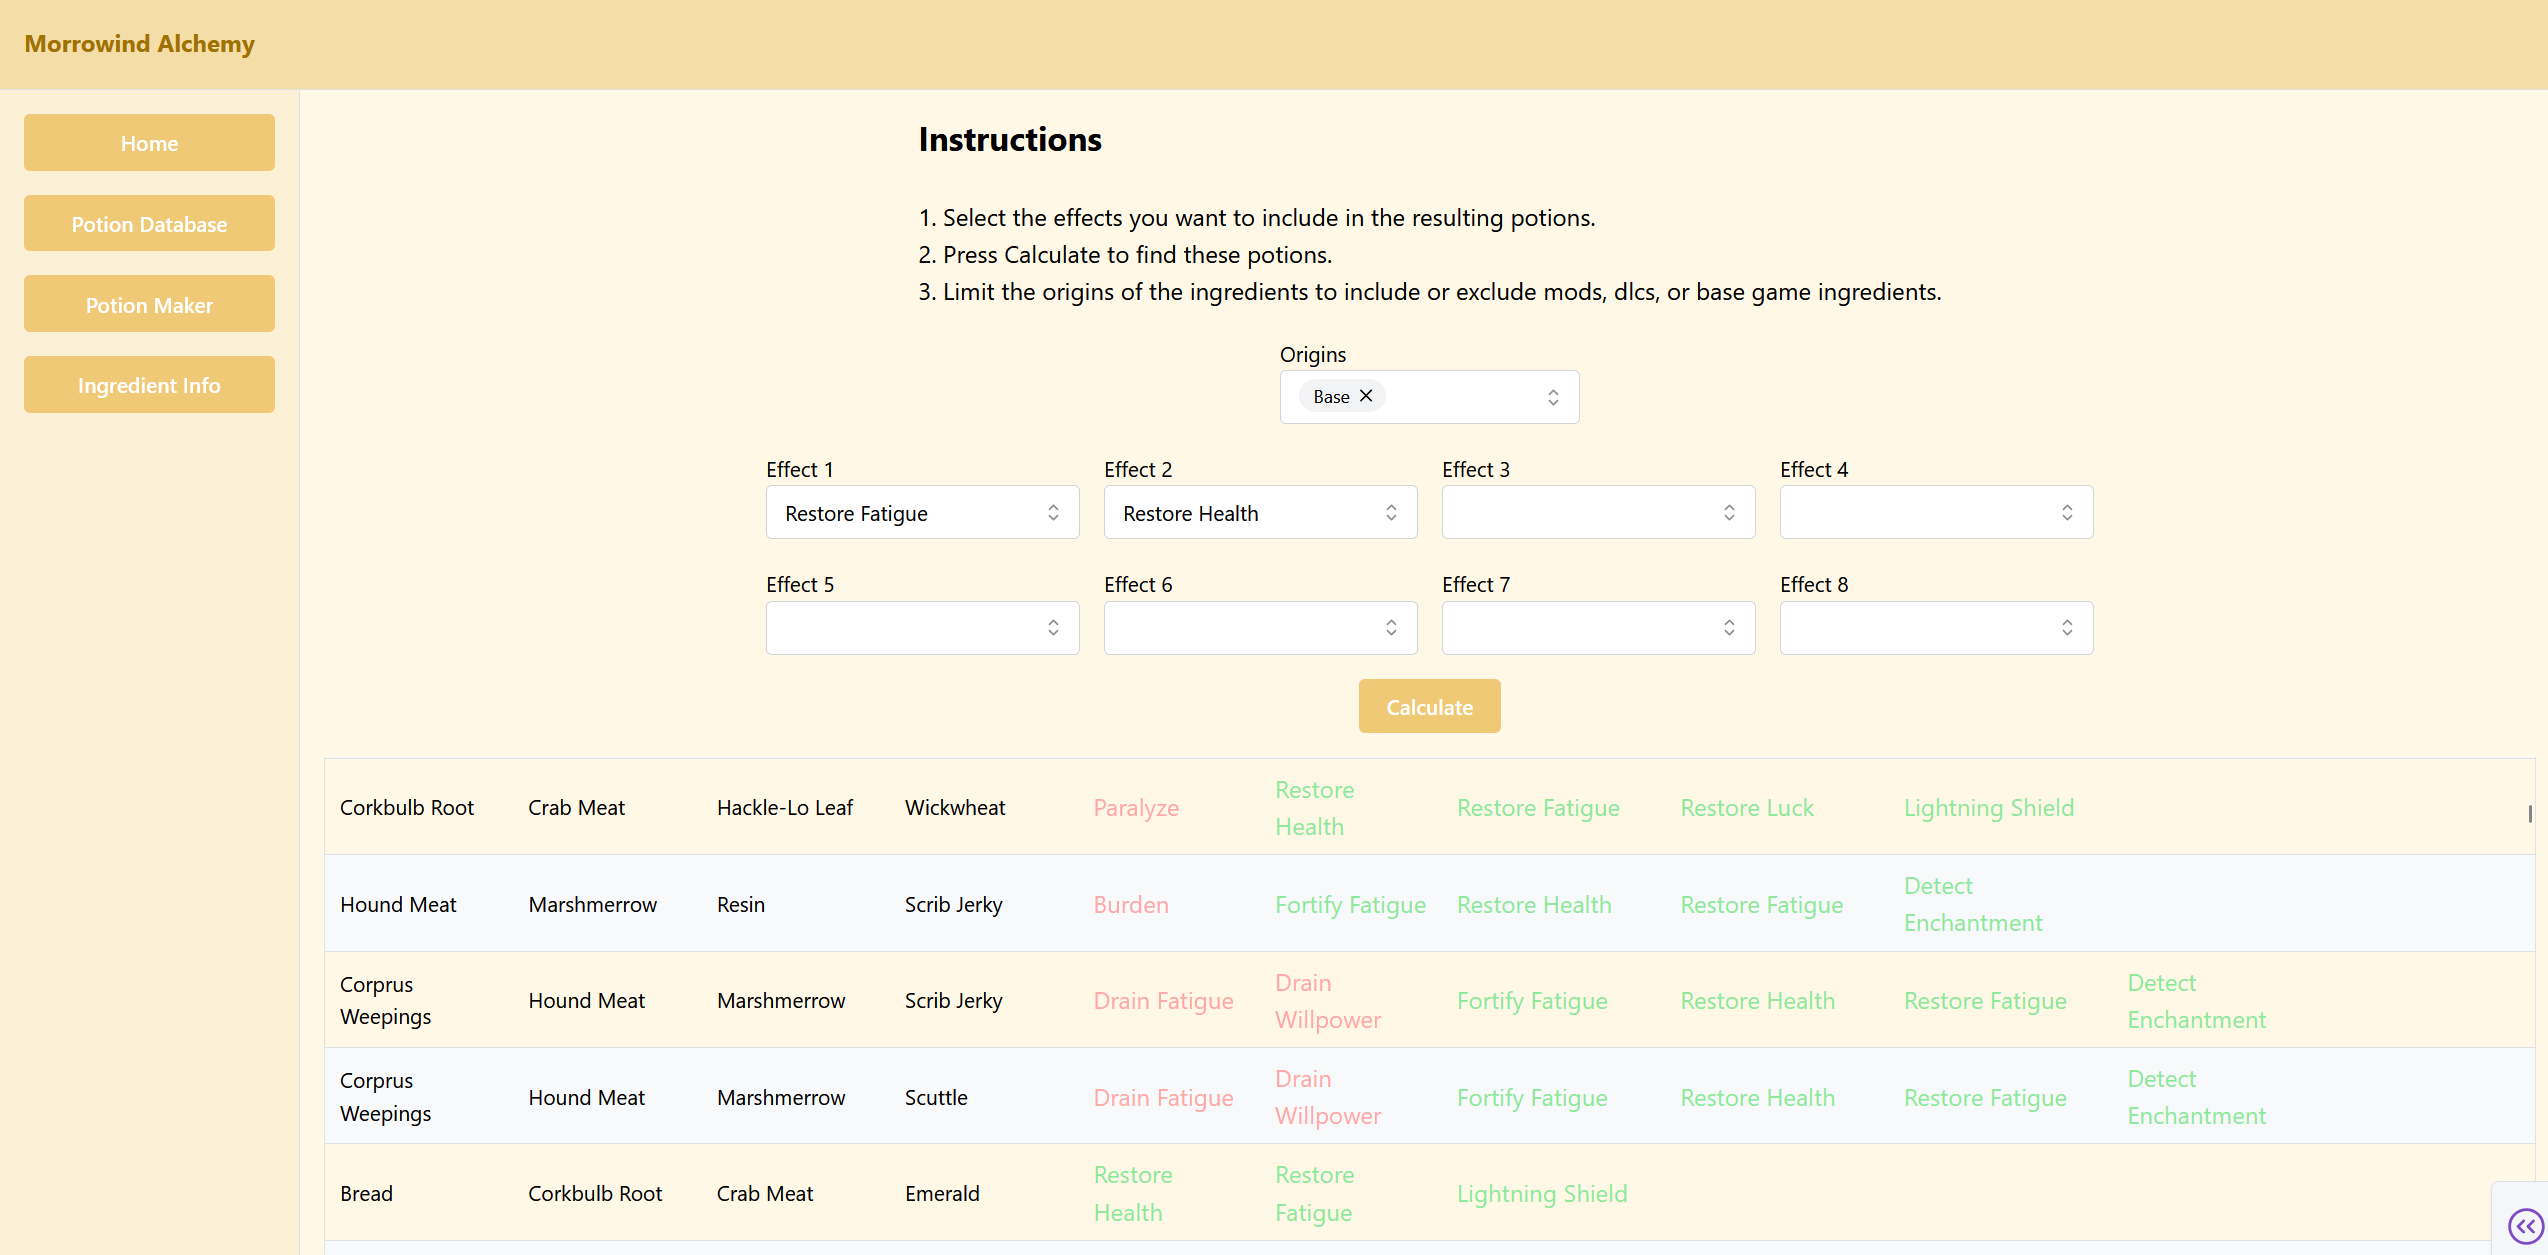 Example page of the finished product
Note: The associated repo can be found here, and the webapp here.
During the first year of my software apprenticeship, I heavily used a Python library called Dash to create a dashboard for the company. As I used the library more, and learnt surrounding skills and technologies, I realised that, despite it’s name, it can be used to create whole webapps, not just dashboards.
In my previous project, I wanted to showcase my skills yet also enjoy myself. That’s why I focused on data from one of my favourite games, Morrowind. My technical skills have improved since that project (almost two years ago!), and I’m still in love with the world of Morrowind.
So, this project will be about building a webapp to showcase my new skills and vastly improve on that past project.
Please note, some familiarity with general programming concepts is assumed. Also, details are covered as and when they are relevant, and many questions will likely be raised that would be out of scope to answer. That said, feel free to reach out to me for these questions. I can at least point you to the documentation!
Tech Stack
In case you want to follow along, this is what I’ll be using for the project.
Frontend
- Dash - A Python library and webapp framework. It has both frontend and backend capabilities.
- Dash Mantine Components - For the frontend, we are specifically going to be using Dash Mantine Components, a library that implements the Mantine React library into Python for Dash.
Backend
- Flask - A well known Python web framework that Dash uses. While we will use the underlying Flask objects sparingly, we do need them for some tasks.
- Python - This general purpose programming language underpins the whole project. A lot of the logic will just be written in pure Python and with common libraries. Please see the requirements.txt file in the repo for the full list. An example of a ‘common’ library is Pandas.
- SQLAlchemy - A Python library for managing databases and database connections. I will specifically be using Flask-SQLAlchemy since this combines with Flask. It is largely the same syntax.
Hosting
- PythonAnywhere - An excellent company that offers free (and paid) hosting for Python projects. It runs on AWS under-the-hood but abstracts away most of the infrastructure management.
- MySQL - PythonAnywhere offers databases as part of their package. The MySQL one is free, so I’ll be using that! This is to the store some Morrowind data.
- Git/GitHub - The code is stored on a git repo. The main benefit is the ability to document and share the code, including between my local development computer and the PythonAnywhere servers.
Goal
The purpose of this project is make it easy to explore alchemy in the game Morrowind. In simple terms, alchemy is where potions are made in the game by combining ingredients. This follows some rules, outlined below, and the goal is to implement these rules, explore the results, and add additional tools to help with related problems (e.g. listing the locations of ingredients).
Definitions:
- An ingredient is a list of one, two, three, or four effects.
- A potential potion is a combination of two, three, or four ingredients.
- A valid potion has each ingredient share at least one of it’s effects
with at least one of the other ingredients.
To give an example, Adamantium Ore has the effects (Burden, Poison, Restore Magicka, Reflect). Comberry has the effects (Drain Fatigue, Restore Magicka, Fire Shield, Reflect). We see they share the effects (Restore Magicka, Reflect), so a potion would contain those effects if those ingredients were combined into one.
The vast majority of the project is not about Morrowind, so please don’t be put off if you have no interest in it. Equally, my passion for the game fuels my desire to make this app, so please look into the game if it does interest you!
Project Structure
The psychological benefit of structure and organisation makes the actual programming much more enjoyable. As well as the practical benefits like locating information faster, it’s just nicer to look at and work with.
Overview
.
├── assets/
│   └── styles.css
├── components/
│   ├── config.py
│   ├── ...
│   └── ...
├── database/
│   ├── ...
│   ├── ...
│   └── ...
├── pages/
│   ├── page one
│   ├── page two
│   └── ...
├── .gitignore
├── .env
├── LICENSE
├── README.md
├── app.py
└── requirements.txt
This looks a little complicated, so let’s explain some of the simpler items right away.
Non-project specific
- LICENSE - A standard MIT license. Anyone is welcome to copy from this project.
- README.md - Contains the markdown for the readme you can read on the repo.
- .gitignore - A standard GitHub provided ignore list for Python projects. Ignores things like IDE project files.
- requirements.txt - Contains the libraries used in the project. I have put only independant libraries. For example, Flask is not listed but is a dependancy of Dash so will be installed automatically.
- .env - The environment file is intentionally a file excluded from the repo. It contains some configuration secrets, like passwords, that are only saved on the computer running the app. This is to prevent these secrets becoming public by not putting them in the code.
Dash
- app.py - This is the entrypoint of the application. In other words, the code execution starts here. As it stands, this file will setup and run the Dash application, and also contains the frontend work for the settings of the navbar, header, and main content area.
- pages/ - This folder contains the pages of this multipage app. Dash automatically searches a folder called pages and then searches for a variable called
layout. It uses this when a page is requested. This is where the majority of our work will be.
- components/ - This is a sort of “catch-all” folder for scripts that don’t belong anywhere else. For a smaller size project like this, it works fine. It contains logic that is too extensive to put coveniently in a page script. It also contains
config.py, while has data for the apps global visual styling.
- assets/ - This is another folder that Dash finds automatically. It is used to contain assets the app can load, such as pictures. It also contains
.css files for styling.
Database
- These files are not used by the app, but are used to create and populate the database. More on this later.
Project Setup
Note: Some code will be omitted or simplified where relevant for brevities sake. Please see the repo for a full understanding.
Boilerplate
The first thing we want to do is create the basic boilerplate for Dash to run.
app.py
from dash import Dash

app = Dash(__name__)

app.layout = []

app.run()
 Lovely blank page
If you run this then navigate to localhost:8050, you should see a lovely blank page. This appears to be the minimum requirements to create a Dash app. You have to create the app, give it a layout (in our case an empty list), then run the app.
How Dash Works - Layout
A quick aside to explain how to create layouts with Dash and Dash Mantine Components. Dash components are functions. For example:
Dash components can be put inside other components. They are entered as a list, either as the first input, or to the input called children. In Dash Mantine Components there are a few layout specific components. Some common ones are:
dmc.Group([a,b,c]) # a, b, and c are arranged in a row
dmc.Stack([a,b,c]) # a, b, and c are arranged in a column
There are a large number of components and function inputs. Please see the Dash and Dash Mantine Components documentation for a better understanding.
Appshell
Next, we want to setup the so-called “AppShell”. The AppShell is a premade component that contains layout information for the navbar, header, and main content area. It comes from Dash Mantine Components.
For the actual contents of the navbar, header, and main content area, I’ve chosen to define them elsewhere. The navbar and header are defined in the components folder in the files navbar.py and header.py. The main content area draws from the pages folder.
app.py
import dash
import dash_mantine_components as dmc

# Contents of navbar and header components
from components.navbar import Navbar
from components.header import Header

layout = dmc.AppShell([
    dmc.AppShellHeader(
        Header(),
    ),
    dmc.AppShellNavbar(
        Navbar(),
    ),
    dmc.AppShellMain(dash.page_container)
],
    header={"height": 60},
    navbar={"width": 200},
)

app.layout = dmc.MantineProvider(layout)
Here, the "height": 60 makes the header 60 pixels tall from the top of the screen, and "width": 200" makes the navbar 200 pixels wide from the left of the screen. The dash.page_container is the object that defines where the current page is located in the layout. You’ll notice it’s contained inside the AppShell, so the navbar and header will not change regardless of which page we are on. The dmc.MantineProvider is necessary to mantine to work and must be the outermost element in the layout. It provides some information to the components, such as the default styling.
For the navbar itself, it’s contents are roughly defined as follows:
components/navbar.py
def Navbar():
    layout = dmc.Stack([
        dmc.Anchor(
            dmc.Button("Home"),
            href="/",
        ),
        dmc.Anchor(
            dmc.Button("Potion Database"),
            href="/potion-database",
        ),
        dmc.Anchor(
            dmc.Button("Potion Maker"),
            href="/potion-maker",
        ),
        dmc.Anchor(
            dmc.Button("Ingredient Info"),
            href="/ingredient-info",
        ),
    ])

    return layout
In other words, it’s just a stack of links made of buttons.
Then, the header is as follows:
components/header.py
def Header():
    layout = dmc.Group([
        dmc.Burger(),
        dmc.Anchor(
            dmc.Title("Morrowind Alchemy"),
            href="/",
        ),
    ])

    return layout
A burger refers to the three horizontal lines that turn into a cross, used to open menus. The three lines look like a burger, I guess… So, the header is one of those and then a link displayed as a “title”. A title is simply a HTML H1-6 header element.
We also need to add at least one page so the page_container can refer to something, and modify app.py to tell it to use the pages.
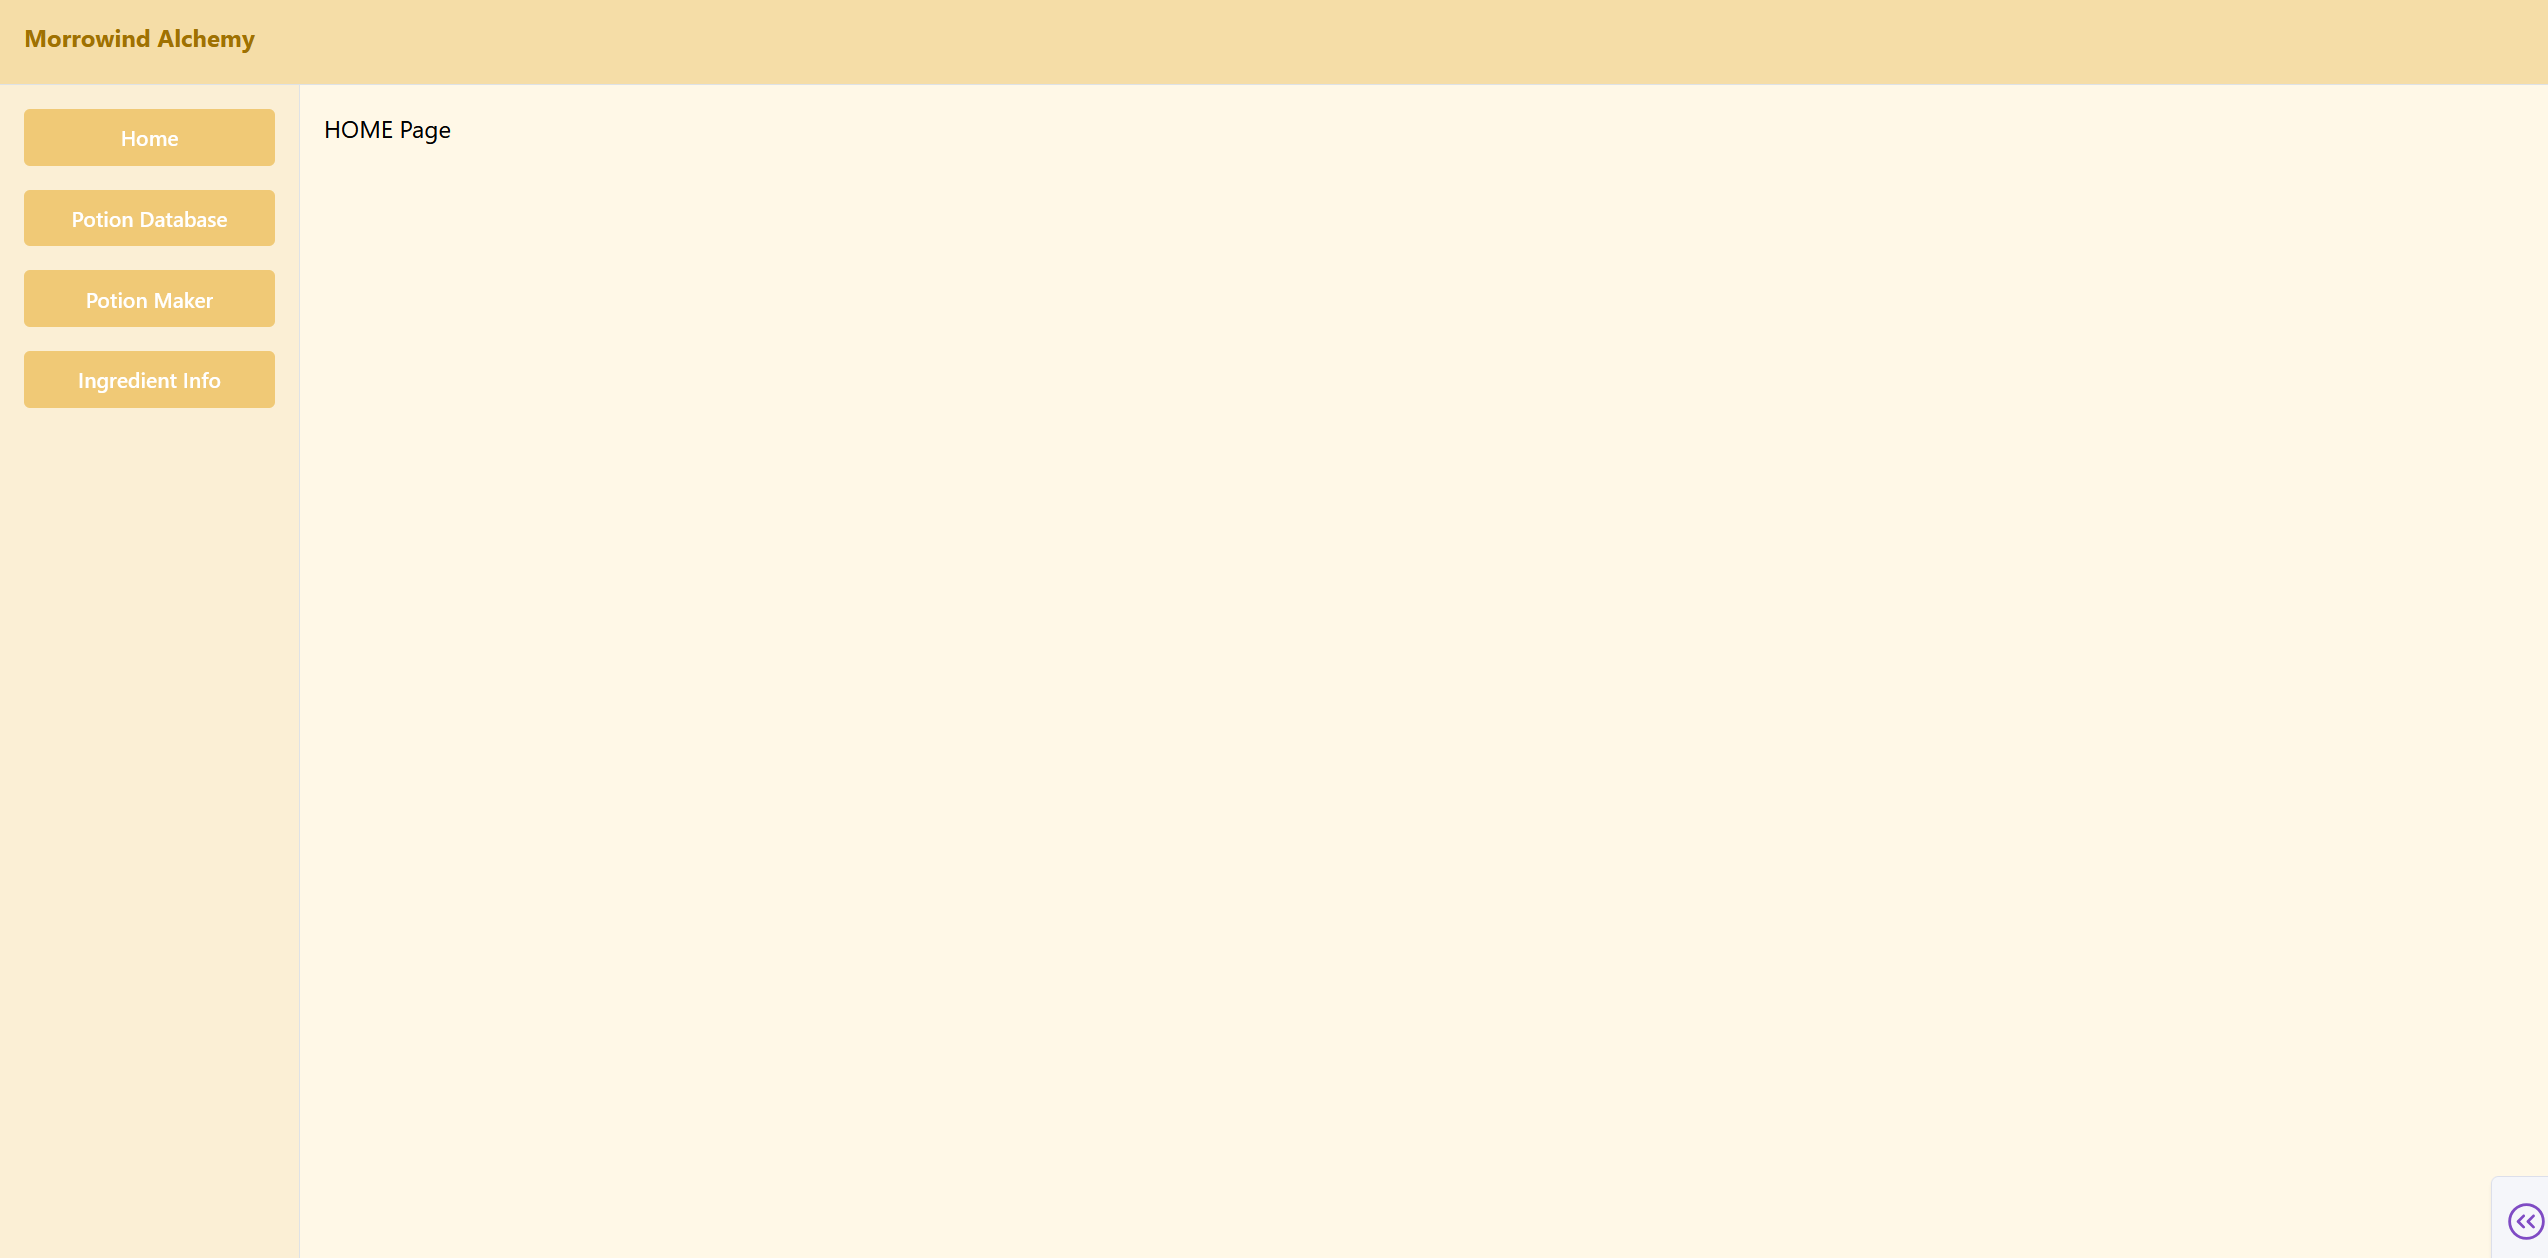
pages/home.py
dash.register_page(__name__, path="/")

layout = dmc.Text("HOME Page")
pages/app.py
app = Dash(__name__, use_pages=True)
The register_page tells dash it is a page, and creates a URL for it. Here, we specifically define the URL as the root path. Otherwise, it converts the file name into the URL, replacing _ with -. The layout variable then defines the contents of the page. So, if we navigate to localhost:8050, it returns the contents of layout to the page_container.
 Appshell
Styling is omitted from the above code. We’ll cover that later, so don’t worry if you’re following along and your version doesn’t look the same.
This covers the basic setup of a working dash app with a navbar and header. For the next step, we need to do some behind-the-scenes stuff to make it actually useful.
Database
For the app to be useful, it needs to do stuff with data. To do stuff with data, we first need to have data. Here we load the data and connect it to the app.
I’ll be using MySQL as the database due to PythonAnywhere only having MySQL and PostgreSQL, and PostgreSQL being a paid only option on the platform.
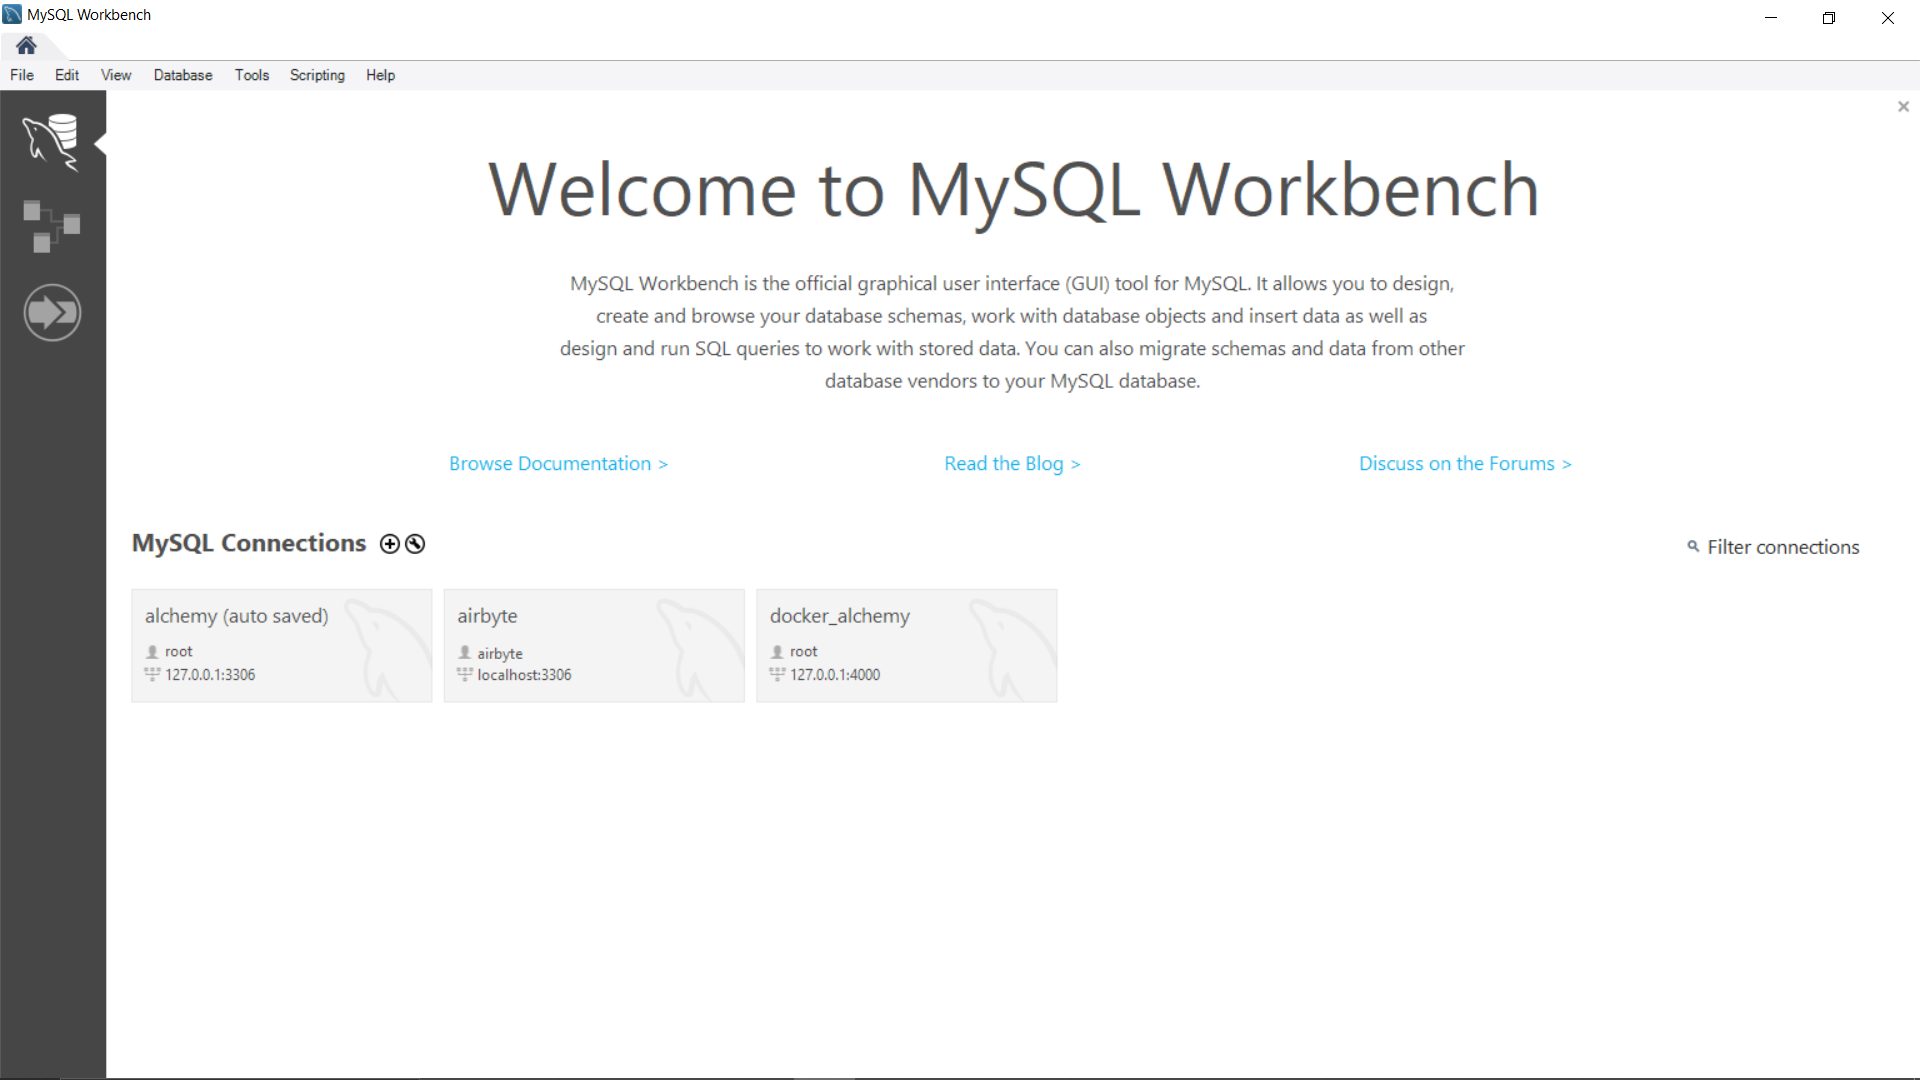 MySQL Workbench
We don’t stricty need to develop the app locally if it’s going to be hosted on the cloud, but it makes it much more convenient. So, optionally, you can download MySQL (the database) here, and MySQL Workbench (a GUI) here. It’s possible that Workbench also installs the database itself. I don’t remember.
Covering SQL in detail is out of scope, but we basically need to create a new schema, create the tables, and load in the data. The actual SQL required after this stage is minimal.
There are three tables in my design:
- The main table, called “Ingredient”, which contains each ingredients name, effects (in a “Yes/No” format), weight, and cost.
- I then added an “Effect” table to store information about each effect, mainly if it’s a positive or negative effect (i.e. useful or harmful, e.g. ‘Strength’ vs ‘Poison’, you can only use potions on yourself in Morrowind. This changes in later games in the series).
- I also added a “Tool” table to store some information about the tools used in alchemy.
The purpose of each of these tables is explained in more detail later.
To create these tables (with no data) we run the following script. You can just copy and paste the contents and run them, or run it as a script. Very large scripts are better run as files as, I’m guessing, the graphical overhead of showing each lines success or failure is significant. Note the below is an excerpt. Please use the actual file from the repo.
database/create_tables.sql
CREATE TABLE `Ingredient` (
  `Value` int NOT NULL,
  `Weight` float NOT NULL,
  `Ingredient` varchar(50) NOT NULL,
  `Origin` varchar(20) DEFAULT NULL,
  `First Effect` varchar(20) DEFAULT NULL,
  `Weakness to Fire` int DEFAULT NULL,
  -- ...
  -- list shortened for brevity
  -- ...
  PRIMARY KEY (`Ingredient`)
);
CREATE TABLE `Effect` (
  `Spell Effects` varchar(50) NOT NULL,
  `Base Cost` float NOT NULL,
  `Positive` tinyint(1) DEFAULT NULL,
  PRIMARY KEY (`Spell Effects`)
);
CREATE TABLE `Tool` (
  `Name` varchar(50) NOT NULL,
  `Quality` float NOT NULL,
  `Type` varchar(20) DEFAULT NULL,
  PRIMARY KEY (`Name`)
);
The original data is located here. The database is designed to be extended with additional effects and ingredients. I’ve also cleaned some of the data as there are some errors (e.g. ingredients have the wrong effects, and replacing the ‘x’s with 1’s and 0’s).
The following three excerpts are from files that contain the needed data for each of the three tables.
database/ingredient_data.sql
INSERT INTO Ingredient(`Value`,`Weight`,`Ingredient`,`Weakness to Fire`,`Blind`,`Burden`,`Paralyze`,`Poison`,`Frost Damage`,`Damage Health`,`Drain Health`,`Drain Fatigue`,`Drain Magicka`,`Drain Strength`,`Drain Intelligence`,`Drain Willpower`,`Drain Agility`,`Drain Speed`,`Drain Endurance`,`Drain Personality`,`Drain Luck`,`Fortify Health`,`Fortify Fatigue`,`Fortify Magicka`,`Fortify Strength`,`Fortify Intelligence`,`Fortify Willpower`,`Fortify Agility`,`Fortify Speed`,`Fortify Endurance`,`Fortify Personality`,`Fortify Luck`,`Fortify Attack`,`Restore Health`,`Restore Fatigue`,`Restore Magicka`,`Restore Strength`,`Restore Intelligence`,`Restore Willpower`,`Restore Agility`,`Restore Speed`,`Restore Endurance`,`Restore Personality`,`Restore Luck`,`Detect Animal`,`Detect Enchantment`,`Detect Key`,`Dispel`,`Feather`,`Invisibility`,`Levitate`,`Light`,`Night Eye`,`Cure Blight Disease`,`Cure Common Disease`,`Resist Common Disease`,`Cure Paralyzation`,`Resist Paralysis`,`Cure Poison`,`Resist Poison`,`Resist Fire`,`Resist Frost`,`Resist Shock`,`Fire Shield`,`Frost Shield`,`Lightning Shield`,`Resist Magicka`,`Reflect`,`Spell Absorption`,`Telekinesis`,`Swift Swim`,`Water Breathing`,`Water Walking`,`Origin`,`First Effect`,`Sound`) VALUES (300,50,'Adamantium Ore',NULL,NULL,1,NULL,1,NULL,NULL,NULL,NULL,NULL,NULL,NULL,NULL,NULL,NULL,NULL,NULL,NULL,NULL,NULL,NULL,NULL,NULL,NULL,NULL,NULL,NULL,NULL,NULL,NULL,NULL,NULL,1,NULL,NULL,NULL,NULL,NULL,NULL,NULL,NULL,NULL,NULL,NULL,NULL,NULL,NULL,NULL,NULL,NULL,NULL,NULL,NULL,NULL,NULL,NULL,NULL,NULL,NULL,NULL,NULL,NULL,NULL,NULL,1,NULL,NULL,NULL,NULL,NULL,'Tribunal','Burden',NULL);
database/effect_data.sql
INSERT INTO Effect(`Spell Effects`,`Base Cost`,`Positive`) VALUES ('Blind',1,NULL);
database/tool_data.sql
INSERT INTO Tool(`Name`,`Quality`,`Type`) VALUES ('Apprentice''s Alembic',0.5,'Alembic');
Please note each of these is one row of data. The full files are longer, especially the ingredient one.
After running those scripts to load in the data, that should be it for the direct SQL stuff. We still do, however, need to link the app with the database, but for that we’ll be strictly using Python.
Database, part 2
So, we have a neat frontend. We have the data in the database. But, how do we connect the app to the database? Flask doesn’t come with its own database manager, but the flask_sqlalchemy module easily adds this on.
Firstly, we need to store an environment variable that contains the connection information for the database. For our local development, it will look something like this:
.env
DATABASE_URI="mysql+mysqldb://<username>:<password>@localhost:3306/<schema>"
For hosting on PythonAnywhere, it looks like this:
.env
DATABASE_URI="mysql+mysqldb://<username>:<password>@<username>.mysql.pythonanywhere-services.com/<username>$<schema>"
Where:
-
is the owner of the database. For local development, I'm using the `root` user.
-
is the password you set for the database. It may default to `admin`.
-
is the name of the database schema.
If you’re using PostgreSQL or anyother database, you’ll have to modify this.
Now, we basically need to “mirror” the database structure in Python using sqlalchemy. It can then treat database items as Python objects.
First, we have to import the environment variable.
components/data_access.py
import os
from dotenv import load_dotenv

path = os.path.join(os.path.dirname(__file__), "../.env")
load_dotenv(path)

database_uri = os.environ.get('DATABASE_URI')
We are using what looks to be a convoluted method to get the filepath name of the .env file. Really, this is necessary for the app to run cross-platform since Windows, Linux, and Mac specify filepaths differently. Since I’m developing locally on a Windows computer, I’d have to otherwise have a seperate file to make it run on the Linux servers on PythonAnywhere.
Next, we connect the underlying flask server to the database.
components/data_access.py
from flask import Flask
from flask_sqlalchemy import SQLAlchemy
from sqlalchemy.orm import DeclarativeBase

class Base(DeclarativeBase):
    pass


db = SQLAlchemy(model_class=Base)

server = Flask(__name__)
server.config["SQLALCHEMY_DATABASE_URI"] = database_uri
server.config['SQLALCHEMY_ENGINE_OPTIONS'] = {'pool_recycle': 280}
db.init_app(server)
To be honest, I’m not sure what the purpose of the class Base is. It was in the documentation. db is the main object we’ll use to do things to the database. Here, we’ve also told the flask server how to access the database, and then connected it to the db object. The 'pool_recycle': 280 is used to discard and regenerate database connections every 280 seconds. This is because PythonAnywhere, and other services, will close database connections after a timeout of 300 seconds.
Now, we need to write a lot of fairly repetitive code to mirror the database objects in Python to the actual database tables in the database. The excerpts that follow should be fairly self-explanatory.
components/data_access.py
from sqlalchemy import Integer, String, Float
from sqlalchemy.orm import mapped_column

class Ingredient(db.Model):
    __tablename__ = "Ingredient"

    Value = mapped_column(Float)
    Weight = mapped_column(Float)
    Ingredient = mapped_column(String(50), primary_key=True)
    Origin = mapped_column("Origin", String(50))
    First_Effect = mapped_column("First Effect", String(50))
    Weakness_to_Fire = mapped_column("Weakness to Fire", Integer)
    # ...

class Effect(db.Model):
    __tablename__ = "Effect"

    Spell_Effects = mapped_column("Spell Effects", String(50), primary_key=True)
    Base_Cost = mapped_column("Base Cost", Float)
    Positive = mapped_column(Integer)

class Tool(db.Model):
    __tablename__ = "Tool"

    Name = mapped_column(String(50), primary_key=True)
    Quality = mapped_column(Float)
    Type = mapped_column(String(50))
In other words, each class is a database table. __tablename__ is used to define the tablename (optional as it otherwise uses the class name). Each variable maps to a table column, and the mapped_column function relates the Python object to the actual columns name and datatype. You might note that naming the columns is optional, as it defaults to the variable name, but is needed in case there are underscores in the variable name but not the actual column name in the database.
For my purposes, the app only needs to load the data on startup. Because of this, I simply define some variables that load data from the database. These are then accessible throughout the app. The only slight issue I’ve found is that, when the database is updated, a currently running session will not update. This could be fairly easily fixed by having a button the reloads the app which would reload the data.
components/data_access.py
import pandas as pd

with server.app_context():
    DF_INGREDIENTS = pd.DataFrame(db.session.execute(db.select(*Ingredient.__table__.columns)))
    DF_EFFECTS = pd.DataFrame(db.session.execute(db.select(*Effect.__table__.columns)))
    DF_TOOLS = pd.DataFrame(db.session.execute(db.select(*Tool.__table__.columns).order_by(Tool.Quality)))
The variables are stored as pandas dataframe. Here, we see an example of how sqlalchemy works. Most requests start with db.session.execute(db.select(...)). These operations map fairly easily to SQL. The slight oddity here is using *Ingredient.__table__.columns instead of just Ingredient to select all the columns. It turns out that selecting individual columns produces a dataframe as expected. However, selecting all the columns just using the table name returns an object where we cannot easily access the underlying data. Try it yourself to see the difference.
Finally, if you’ve been paying careful attention, you’ll realise the server here never actually links back to our dash app! So, we need to make an adjustment to our app.py to connect our modified flask server to it.
app.py
from components.data_access import server

app = Dash(__name__, server=server, use_pages=True)
If we run the app, nothing should change visually. If you don’t get any errors, the connection should be working. We’ll be using the data from the database soon. To run the app in developer mode to check for errors, use:
How Dash Works - Styling
The last major component of the general app, before we start diving into the individual pages, is the styling. We can style the app in a few ways:
- Components have parameters that control styling. For example
bg for background color. These ultimately translate into css, and most components can be directly styled with it using the style parameter.
dmc.MantineProvider takes a theme input. This is used to define styling that applies across the app.- The assets folder can contain
.css files. This can be used to create css classes to style individual components, or to style components globally similar to the themes variable.
Of these, styling components directly in python is the quickest, but the least repeatable. It’s useful for one-off components such as the AppShell, or simple styles. Here is how I have styled the AppShell itself (not the layouts of the navbar or header).
app.py
layout = dmc.AppShell([
    dmc.AppShellHeader(
        Header(),
        p="md",
        bg="myColors.2"
    ),
    dmc.AppShellNavbar(
        Navbar(),
        p="md",
        bg="myColors.1"
    ),
    dmc.AppShellMain(dash.page_container)
],
    header={"height": 60},
    navbar={"width": 200,},
    p="md",
    bg="myColors.0",
)
Here, p is for padding, and bg is for background color. However, what does md refer to? What does myColors.0 refer to? Mantine has a default theme, and this defines some variables, but we can modify this to create our own theme object. Notably, myColors is a custom variable that will not work yet as a custom theme has not been defined. The below is an excerpt of my custom theme:
components/config.py
myColors = [
    "#fff8e7",
    "#fbefd5",
    "#f5dda7",
    "#f0c976",
    "#ecb94e",
    "#eaaf34",
    "#e9aa26",
    "#cf941a",
    "#b88312",
    "#9f7102",
]

theme = {
    "colors": {
        "myColors": myColors,
    },
    "primaryColor": "myColors",
    "primaryShade": 3,
    "breakpoints": {
        "xs": '30em',  # Default values for reference
        "sm": '48em',
        "md": '64em',
        "lg": '74em',
        "xl": '90em',
    },
    "components": {
        "Select": {
            "styles": {
                "dropdown": {"background": myColors[4]},
            }
        },
        "TagsInput": {
            "styles": {
                "dropdown": {"background": myColors[4]},
            }
        },
        "MultiSelect": {
            "styles": {
                "dropdown": {"background": myColors[4]},
            }
        },
    },
}
While not all of this is yet relevant, we can see how myColors is defined as a list of 10 colours. These can the be accessed within the app using myColors.0 to myColors.9. Some css is also specfied for some components that will apply globally.
Lastly, we can write css on its own and attach it to components via class names, or affect all components of a particular type. Mantine exposes various class names we can use which you can read about in the documentation.
For example, I’d like the navbar to change size on different screens so that it remains user friendly. I can define some css below:
assets/styles.css
.media-navbar-anchor {
    height: 15%;
    min-height: 35px;

    @media (min-width: 48em) {
        height: 5%;
    }
}

.media-navbar-button {
    height: 100%;

    @media (max-width: 48em) {
        font-size: 1rem;
    }
}

.media-navbar {
    height: 100%;
    overflow-y: scroll;
}
Then, I can modify the navbar.py file to use these classes.
components/navbar.py
def Navbar():
    layout = dmc.Stack([
        dmc.Anchor(
            dmc.Button("Home", fullWidth=True, id="nav-btn-home",
                       className="media-navbar-button"),
            href="/", underline="never", c="myColors.9",
            className="media-navbar-anchor"
        ),
        dmc.Anchor(
            dmc.Button("Potion Database", fullWidth=True, id="nav-btn-data",
                       className="media-navbar-button"),
            href="/potion-database", underline="never", c="myColors.9",
            className="media-navbar-anchor"
        ),
        dmc.Anchor(
            dmc.Button("Potion Maker", fullWidth=True, id="nav-btn-maker",
                       className="media-navbar-button"),
            href="/potion-maker", underline="never", c="myColors.9",
            className="media-navbar-anchor"
        ),
        dmc.Anchor(
            dmc.Button("Ingredient Info", fullWidth=True, id="nav-btn-info",
                       className="media-navbar-button"),
            href="/ingredient-info", underline="never", c="myColors.9",
            className="media-navbar-anchor"
        ),
    ],
        className="media-navbar"
    )

    return layout
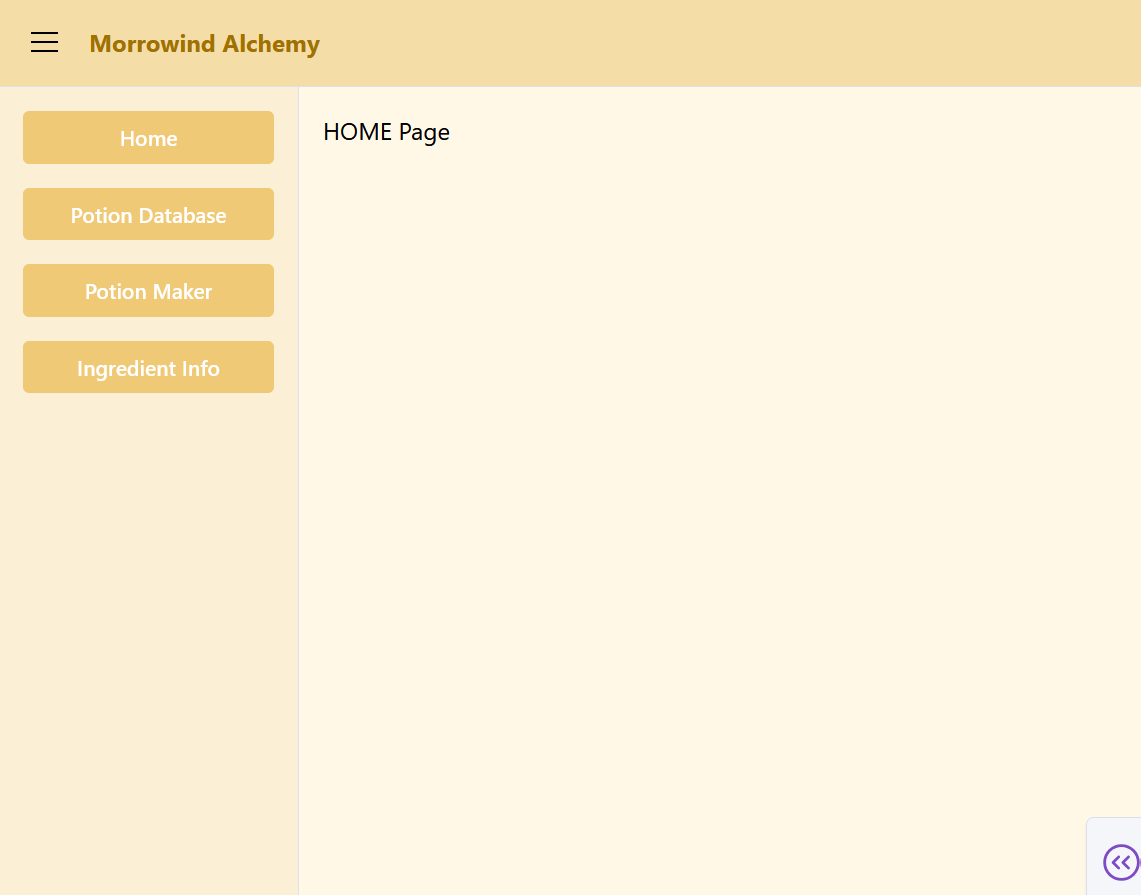 normal
 bigger, for e.g. tablets
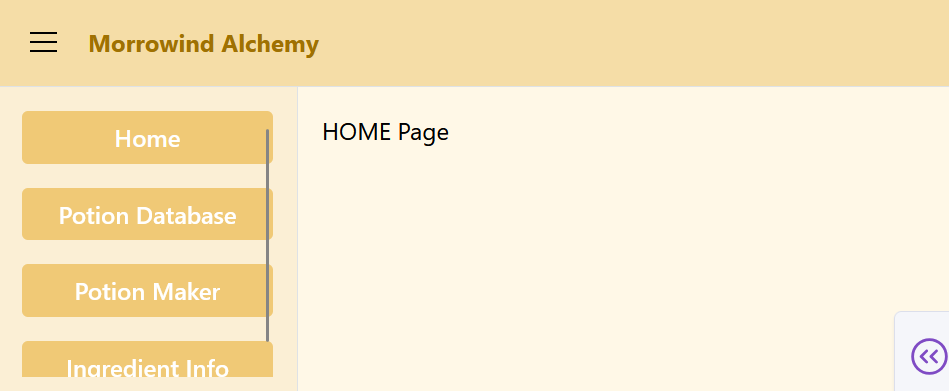 scrollable, for e.g. phones
Now the navbar has some styling written in Python, and uses the styling of the .css file. When the screen changes size, the buttons and font should change size. The navbar should also now be scrollable on very small screens. Try it out on different devices, or by resizing the window.
This covers the basics of how to style components.
Home page (WIP)
A simple page to describe how to use the webapp and where to go next. Also contains any misc. information like the location of the git repo.
Potion Database
This page is the crowning achievement of the app. It finds all possible potions based on what effects are desired. There are literally millions of possible combinations, and due to the app allowing custom ingredients to be added, this can grow even further.
For context, the unmodded game has around 100 ingredients. If we assume every ingredient can be combined with every other ingredient, the total number of four ingredient potions (the vast majority) would be 100*99*98*97/(4*3*2*1)=3,921,225. There are not quite this many due to our assumption being wrong, but it demonstrates the infeasibility of searching every combination by hand.
Frontend
The frontend is made up of a few components. First, we have some text to explain how the page works:
pages/potion_database.py
text = """
1. Select the effects you want to include in the resulting potions.
2. Press Calculate to find these potions.
3. Limit the origins of the ingredients to include or exclude mods, dlcs, or base game ingredients.
"""

explain_title = dmc.Title("Instructions", order=3)
explain_text = dmc.Text(text, style={"white-space": "pre-wrap"})
explain_stack = dmc.Stack([
    explain_title,
    explain_text,
],
    gap=0
)
Putting the title and the text in a stack helps keep things aligned. The order parameter controls what type of html header we use, in this case H3. The css parameter white-space: pre-warp keeps the newline content of the string. Otherwise, it would ignore these and show as one long line of text only going on to new lines when the screen is not wide enough. The gap=0 reduces the gap between the elements of the stack.
Then, we have a button to limit the origin of the ingredients (e.g. from the base game, offical extra content, or fan made extra content):
pages/potion_database.py
from components.data_access import DF_INGREDIENTS

data_origin = DF_INGREDIENTS["Origin"].unique()
origin_selecter = dmc.MultiSelect(label="Origins", data=data_origin,
                                  w=200, id="data-origins")
Here, we can finally see the use of the database. The app loads in the contents of DF_INGREDIENTS, which is essentially the ingredient table in the database. Since it is a pandas dataframe, we can use the unique method on the origins column to get a list of all the origins. This is useful as the origins list may grow as ingredients are added from different sources. We then assign this data to a MultiSelect component. This allows, as the name implies, a selection of multiple options from a list. Note we’ve also given it an id, which will become relevant soon.
Next, a set of eight (8) selection boxes that allow a selection from a scrollable list:
pages/potion_database.py
effects_list = list(DF_EFFECTS["Spell Effects"])

effects = dmc.Stack([
    dmc.Group([
        dmc.Group([
            dmc.Select(label="Effect 1",
                       data=effects_list,
                       value="",
                       searchable=True,
                       id="Effect 1"),
            dmc.Select(label="Effect 2",
                       data=effects_list,
                       value="",
                       searchable=True,
                       id="Effect 2"),
        ], justify="center", wrap="nowrap"),
        dmc.Group([
            dmc.Select(label="Effect 3",
                       data=effects_list,
                       value="",
                       searchable=True,
                       id="Effect 3"),
            dmc.Select(label="Effect 4",
                       data=effects_list,
                       value="",
                       searchable=True,
                       id="Effect 4"),
        ], justify="center", wrap="nowrap"),
    ], justify="center"),
    dmc.Group([
        dmc.Group([
            dmc.Select(label="Effect 5",
                       data=effects_list,
                       value="",
                       searchable=True,
                       id="Effect 5"),
            dmc.Select(label="Effect 6",
                       data=effects_list,
                       value="",
                       searchable=True,
                       id="Effect 6"),
        ], justify="center", wrap="nowrap"),
        dmc.Group([
            dmc.Select(label="Effect 7",
                       data=effects_list,
                       value="",
                       searchable=True,
                       id="Effect 7"),
            dmc.Select(label="Effect 8",
                       data=effects_list,
                       value="",
                       searchable=True,
                       id="Effect 8"),
        ], justify="center", wrap="nowrap")
    ], justify="center")
])
These are for choosing what effects you want in the calculated potions. Since each ingredient has up to 4 effects, up to 4 ingredients can be mixed together, and the effects have to be paired up with another ingredient, we have 16/2=8 total possible effects.
The structure can seem a bit complicated as its designed to look good on a range of devices. It is a stack of 2 groups, the first group containing the effects 1 to 4, the second 5 to 8. Within each group, there are 2 groups. These groups contain pairs of effects, e.g. effects 1 and 2, effects 3 and 4, etc. The outer groups are allowed to “wrap”, that is, go onto a new line if there is not sufficient horizontal space. The inners groups, the pairs, are not allowed to wrap. This keeps the pairs together to stop unpleasant layouts like a differing number of selects on each line, while allowing pairs to go onto new lines, and while stopping all 8 selects from appearing on one line even if there is enough space (e.g. wide-screens).
Next, a button to calculate the potions:
pages/potion_database.py
calc_button = dmc.Button("Calculate", id="Effect Button")
There really isn’t much to say about this. Again, the id will become relevant soon.
Next, a grouping to gather all these elements together:
pages/potion_database.py
effects_with_button = dmc.Stack([
    explain_stack,
    origin_selecter,
    effects,
    calc_button,
],
    align="center"
)
This keeps the components aligned with each other for a good looking layout. If we want to swap things around, it also helps grouping related components together in case you want to move all of them. Conceptually, it also helps me see a high-level view of the overall layout without having to know the details of each collection of components.
Next, a table to put the resulting potions:
pages/potion_database.py
head = dmc.TableThead(
    dmc.TableTr(
        [
            dmc.TableTh("Ingredient 1"),
            dmc.TableTh("Ingredient 2"),
            dmc.TableTh("Ingredient 3"),
            dmc.TableTh("Ingredient 4"),
            dmc.TableTh("Effect 1"),
            dmc.TableTh("Effect 2"),
            dmc.TableTh("Effect 3"),
            dmc.TableTh("Effect 4"),
            dmc.TableTh("Effect 5"),
            dmc.TableTh("Effect 6"),
            dmc.TableTh("Effect 7"),
            dmc.TableTh("Effect 8"),
        ]
    )
)

body = dmc.TableTbody(id="Effect Table")

caption = dmc.TableCaption("End of Table")

potions_table = dmc.Table([head, body, caption],
                          withTableBorder=True,
                          highlightOnHover=True,
                          highlightOnHoverColor="myColors.8",
                          striped=True,
                          )
potions_table = dmc.TableScrollContainer(
    potions_table, minWidth=0, maxHeight=425, type="native"
)

loading_overlay = dmc.LoadingOverlay(id="data-loader-overlay")

potions_table = dmc.Box([
    loading_overlay,
    potions_table,
], pos="relative")
Tables are a fairly big component, with a lot of boilerplate syntax. Hopefully the general idea is self-explanatory. head is for the header, body is for the rest of the table, caption is for the caption at the bottom of the table. The TableScrollContainer is used to add horizontal and vertical scrolling to the table if it exceeds a certain size. The LoadingOverlay can display a loading sign on top of another element to e.g. indicate a process is ongoing. It overlays the nearest element in the layout that can be overlayed.
And, finally, a grouping of all the elements:
pages/potion_database.py
layout = dmc.Stack([
    effects_with_button,
    potions_table,
])
It’s somewhat long, but not too complicated. I hope, anyway!
You might notice, if you run the app, that none of these inputs actually do anything. And why would they? We haven’t written any code for them!
How Dash Works - Callbacks
This is where the concept of callbacks comes into play. Components in Dash have ids and other parameters. Callbacks are functions that take a components id and a parameter from that component as input or output. For inputs, the callback is called when that parameter of that component changes. For outputs, what the function returns is sent to that parameter of that component.
Let’s look at how to cause the loading overlay to appear when the table is updating.
pages/potion_database.py
@callback(
    Output("data-loader-overlay", "visible"),
    Input("Effect Button", "n_clicks"),
)
def enable_loader(n_clicks):
    """Enable loader on Calculate button click"""
    return True
We see here that the input, the thing the callback will be called by, is the n_clicks parameter of the component with id Effect Button. This component is the button we created to calculate potions, and n_clicks is the number of times the button has been clicked. The output goes to the overlay, identified by the id data-loader-overlay, and the output of the function changes the visible property of this component. Finally, the function itself merely returns True, so clicking the button will cause the overlay to appear. In a different callback, we remove the overlay once the table contents have been calculated.
Backend
The only other callback in this script is used to cause the calculate button to calculate the possible potions from the effects selections, and update the table accordingly. It’s a bit long, so I’ll explain it in parts.
First, we have to define the inputs and outputs. There’s also another idea called State. This is like Input in that the function reads in this value. However, it is unlike input in that it doesn’t trigger the function. The function is only aware of the parameters of state, hence the name.
pages/potion_database.py
@callback(
    Output("Effect Table", "children"),
    Output("data-loader-overlay", "visible", allow_duplicate=True),
    Input("Effect Button", "n_clicks"),
    State("data-origins", "value"),
    State("Effect 1", "value"),
    State("Effect 2", "value"),
    State("Effect 3", "value"),
    State("Effect 4", "value"),
    State("Effect 5", "value"),
    State("Effect 6", "value"),
    State("Effect 7", "value"),
    State("Effect 8", "value"),
    prevent_initial_call=True
)
def calculate_potions(
        n_clicks,
        origins,
        value_1,
        value_2,
        value_3,
        value_4,
        value_5,
        value_6,
        value_7,
        value_8
        ):

    # ...
    # ... code goes here ...
    # ...
The input is the clicking of the calculate button. The outputs are the tables content, and the visible property of the overlay. The states are simply the values of the origin select, and the effect selects. What are the allow_duplicate=True and prevent_initial_call=True? Well the later stops the callback from running on app startup. The former allows multiple callbacks to reference the same output. We’ll get back to this idea soon.
pages/potion_database.py
@callback(
    # ...
)
def calculate_potions(
        # ...
        ):

    time.sleep(0.1)

    if not (value_1 or value_2 or value_3 or value_4 or
            value_5 or value_6 or value_7 or value_8):
        return [], False

    # ... code below ...
Oh, well that’s quite simple. We wait a short time, then check if the effect selects are all empty. If they are, we simply return an empty list (for the table) and turn off the loading overlay. Of course, we still have to deal with slightly more interesting case when the effects are all empty. But, why the time.sleep? The answer is that we cannot guarantee the order of the callbacks. This is the reason we have to stop the initial call. When the app starts, we don’t know which callback will trigger first. More importantly, it’s not completly clear which callback will trigger first in general. It might seem that, since this callback will do some number crunching logic, it will trigger last. However, playing around with the app when there are no effects selected makes it quite clear that this callback is fast enough to be triggered first. The consequence is the loading overlay is first set to false by this callback, then set true by the other callback. So, the user sees an infinite loading icon and does not know if it’s actually doing something (and it’s not). This solution is not necessarily foolproof or optimal, but it seems to maintain the order so far.
Okay, now it gets complicated. We don’t want this callback to calculate the potion maths directly. It will call a seperate function for that. But, we want it to send the correctly formatted information to that function, and turn that functions output into the correct format for the table. First, the input formatting.
pages/potion_database.py
@callback(
    # ...
)
def calculate_potions(
        # ...
        ):

    # ... code above ...

    restrictions = []
    for i in [value_1, value_2, value_3, value_4,
              value_5, value_6, value_7, value_8]:
        if i not in [None, "", []]:
            restrictions.append(i)

    # Limit to selected origins
    origin_limited = DF_INGREDIENTS.copy()
    if origins:
        origin_limited = origin_limited[origin_limited["Origin"].isin(origins)]

    potions_1 = origin_limited
    potions_2 = potion_combinations(potions_1, restrictions)  # pairs
    potions_3 = potion_combinations(potions_2, restrictions)  # triplets
    potions_4 = potion_combinations(potions_3, restrictions)  # linked quads
    potions_2_2 = potion_quads(potions_2, restrictions) # 2 unlinked pairs
    potions = pd.concat([potions_2, potions_3, potions_4, potions_2_2])
    potions = potions.reset_index().drop("index", axis=1)

    # ... code below ...
The restrictions variable stores the values of the effect selects (that are not empty). This is later fed to our custom potion_combainations function. It’s purpose is to tell that function what effects we want to restrict the outputs to.
Next, we want to only include ingredients from the origins specified. We need to copy the whole list, stored in DF_INGREDIENTS, and make a copy to avoid the pitfalls of assigning multiple variables to the same object without realising (i.e. mutable vs immutable objects). We then simply limit the dataframe by rows with the column Origin containing values in selecting in the origins multiselect.
The last few lines are simply calling the potion_combinations function in the necessary ways. We’ll cover how it works in the next titled section. The basic idea is that we can build potions with more ingredients from previously calculated potions. We can have 2 ingredients (pairs), 3 (triplets), or 4 (quadruplets). Due to the way the function works, it does not account for the case where 2 pairs of ingredients share no effects between them. This ‘edge’ case, what I’ve called “2 unlinked pairs”, makes up the vast majority of potions. The last two lines simply merge all these combinations together and, due to the sequential nature of the input, resets the index (i.e. sets the first row to “0”, the second to “1”, etc).
Once we’ve got the combinations from the functions, we need to convert them into a form that works for the table. There are a few tasks we have.
- I’d like the potions to be in descending order of number of positive effects, and then ascending order of negative effects. So, the “most positive, least negative” potion comes first.
- The way
potion_combinations works, it includes every potion with at least one of the effects. This is for practical reasons since we need this information to builds e.g. triplets from pairs, but for the table we want only potions with all the effects.
- Format the final results for the table rows
pages/potion_database.py
@callback(
    # ...
)
def calculate_potions(
        # ...
        ):

    # ... code above ...

    # We remove the ingredients columns to do maths on
    # the effect columns. We'll save the ingredients to
    # add them back on later
    ingredients_columns = ["Ingredient", "Ingredient 2",
                           "Ingredient 3", "Ingredient 4"]
    shared_columns = potions.columns.intersection(ingredients_columns)
    potions_ingredients = potions[shared_columns]
    potions = potions.drop(ingredients_columns, axis=1, errors='ignore')

    # potion_combinations returns all combinations where each
    # ingredient has at least one of the restrictions. We need
    # to further limit this to combinations where every restriction
    # is included
    ingredients_restrictions = pd.Series([True for _ in range(len(potions))])
    for i in restrictions:
        ingredients_restrictions = ingredients_restrictions & (potions[i] == 2)
    potions = potions[ingredients_restrictions]

    # ... code below ...
Here, we first split the potions into ingredient names, like “Adamantium Ore”, and the effects like “Reflect”. This is because we still have to do some transformations, but only on the effects. The errors='ignore' is to continue the program even if the pandas drop operation doesn’t find some of the listed columns. This is because e.g. a potion pair will have no “Ingredient 3” column as it only has two ingredients.
Next, we have to understand the underlying data returned by potion_combinations. For the selected effects, each entry for each row is either 0, 1, or 2. This is the number of times that effect appears across the ingredients (capped at 2) included in that row. In other words, 0 means it does not have an effect, 1 also means the potion does not have the effect but one of the ingredients does, and 2 means it does have that effect. We need to make sure every effect is included. In other words, that 2’s appear in each column.
Now, we need to replace the numbers with the effect names.
pages/potion_database.py
@callback(
    # ...
)
def calculate_potions(
        # ...
        ):

    # ... code above ...

    potions = potions.where(potions < 2, potions.columns.to_series(), axis=1)

    # Get the ingredient names indexed correctly after the .where operation
    potions_ingredients = potions.join(potions_ingredients)[shared_columns]
    potions_ingredients = potions_ingredients.fillna('')
    potions = potions.to_numpy()

    # ... code below ...
We replace values of 2 (or bigger, but there aren’t any) with the value of the column it’s in. Then, we update the ingredient names so that they corrospond with the effects list. E.g., if the row 1 was removed, we need to remove row 1 of the ingredients variable as well. We have to make sure that, even for potion pairs and triplets, that all four ingredient names are included. If they’re empty, we use an empty string. This is because the table will display columns for all four ingredients and so we need values even if they are empty.
Now, we need to do a similar thing for the effects.
pages/potion_database.py
@callback(
    # ...
)
def calculate_potions(
        # ...
        ):

    # ... code above ...

    potion_as_words = []
    for index, potion in enumerate(potions):

        # Remove effects not part of the ingredients (0)
        # or in only an ingredient but not the other (1)
        potion = potion[potion != 0]
        potion = potion[potion != 1]
        potion_as_words.append(potion)

    # ... code below ...
This removes the 0’s and 1’s that are still lingering around. These would otherwise display in the table under the effects headings. This should just leave what was the 2’s, which we have already replaced with the actual effect names.
We haven’t yet combined the ingredient names with the effects or made sure each row is of the same length regardless of the number of ingredients or effects.
pages/potion_database.py
@callback(
    # ...
)
def calculate_potions(
        # ...
        ):

    # ... code above ...

    # Sort by +ve effects descending, -ve effects ascending
    potion_sorted = []
    for i in potion_as_words:
        total = len(i)
        num_pos = 0
        for j in i:
            num_pos -= DF_EFFECTS[DF_EFFECTS["Spell Effects"] == j]["Positive"].iloc[0]
        for j in range(8 - len(i)):
            i = np.append(i, '')
        part_one = np.append(total+num_pos, i)
        potion_sorted.append(np.append(num_pos, part_one))

    ingredients_sorted = []
    potions_ingredients = potions_ingredients.to_numpy()
    for i in potions_ingredients:
        for j in range(4-len(i)):
            i = np.append(i, '')
        ingredients_sorted.append(i)

    if potion_sorted != []:
        potion_sorted = np.append(ingredients_sorted, potion_sorted, axis=1)

    # ... code below ...
The first for loop uses the DF_EFFECTS variable, effectively a copy of the Effects table from the database, to work out the number of positive and negative effects for each row of the effects dataframe. We also adds some empty strings on the end to fill out any empty effects for the table (e.g. not all potions have eight effects). Then, we also fill out the empty ingredient names with empty strings. Finally, we combine the two together.
The data is now almost ready, we just need to sort them and put them into the table.
pages/potion_database.py
@callback(
    # ...
)
def calculate_potions(
        # ...
        ):

    # ... code above ...

    dtype = [('ing 1', object),
             ('ing 2', object),
             ('ing 3', object),
             ('ing 4', object),
             ('pos', float),
             ('neg', float),
             ('e1', object),
             ('e2', object),
             ('e3', object),
             ('e4', object),
             ('e5', object),
             ('e6', object),
             ('e7', object),
             ('e8', object)]
    potion_sorted = [tuple(i) for i in potion_sorted]
    potion_sorted = np.array(potion_sorted, dtype=dtype)
    potion_sorted = np.sort(potion_sorted, order=['pos', 'neg'])

    potion_data = []
    for index, potion in enumerate(potion_sorted):
        new_row = {
            "Ingredient 1": potion[0],
            "Ingredient 2": potion[1],
            "Ingredient 3": potion[2],
            "Ingredient 4": potion[3],
            "Effect 1": potion[4+2],
            "Effect 2": potion[5+2],
            "Effect 3": potion[6+2],
            "Effect 4": potion[7+2],
            "Effect 5": potion[8+2],
            "Effect 6": potion[9+2],
            "Effect 7": potion[10+2],
            "Effect 8": potion[11+2],
        }
        potion_data.append(new_row)

    rows = [
        dmc.TableTr([
            dmc.TableTd(potion_datum["Ingredient 1"]),
            dmc.TableTd(potion_datum["Ingredient 2"]),
            dmc.TableTd(potion_datum["Ingredient 3"]),
            dmc.TableTd(potion_datum["Ingredient 4"]),
            dmc.TableTd(dmc.Text(potion_datum["Effect 1"], c="red" if DF_EFFECTS[DF_EFFECTS["Spell Effects"]==(potion_datum["Effect 1"] or "Drain Fatigue")]["Positive"].iloc[0]==0 else "green")),
            dmc.TableTd(dmc.Text(potion_datum["Effect 2"], c="red" if DF_EFFECTS[DF_EFFECTS["Spell Effects"]==(potion_datum["Effect 2"] or "Drain Fatigue")]["Positive"].iloc[0]==0 else "green")),
            dmc.TableTd(dmc.Text(potion_datum["Effect 3"], c="red" if DF_EFFECTS[DF_EFFECTS["Spell Effects"]==(potion_datum["Effect 3"] or "Drain Fatigue")]["Positive"].iloc[0]==0 else "green")),
            dmc.TableTd(dmc.Text(potion_datum["Effect 4"], c="red" if DF_EFFECTS[DF_EFFECTS["Spell Effects"]==(potion_datum["Effect 4"] or "Drain Fatigue")]["Positive"].iloc[0]==0 else "green")),
            dmc.TableTd(dmc.Text(potion_datum["Effect 5"], c="red" if DF_EFFECTS[DF_EFFECTS["Spell Effects"]==(potion_datum["Effect 5"] or "Drain Fatigue")]["Positive"].iloc[0]==0 else "green")),
            dmc.TableTd(dmc.Text(potion_datum["Effect 6"], c="red" if DF_EFFECTS[DF_EFFECTS["Spell Effects"]==(potion_datum["Effect 6"] or "Drain Fatigue")]["Positive"].iloc[0]==0 else "green")),
            dmc.TableTd(dmc.Text(potion_datum["Effect 7"], c="red" if DF_EFFECTS[DF_EFFECTS["Spell Effects"]==(potion_datum["Effect 7"] or "Drain Fatigue")]["Positive"].iloc[0]==0 else "green")),
            dmc.TableTd(dmc.Text(potion_datum["Effect 8"], c="red" if DF_EFFECTS[DF_EFFECTS["Spell Effects"]==(potion_datum["Effect 8"] or "Drain Fatigue")]["Positive"].iloc[0]==0 else "green")),
        ])
        for potion_datum in potion_data
    ]

    return rows, False
The code here is kind of long, but that’s just because of the table having twelve columns. I could likely shorten this using some sort of function or loop. The first block finally sorts the potions by number of positive effects descending, and then number of negative effects ascending. For some reason, numpy required explicit statements of the datatypes to correctly sort the rows.
The maining code, while rather long, is just inputting each rows data into the correct column and adding a little color. Positive effects are shown as green, negative as red. The reason for the +2’s in the new_row variables is to factor in the positive and negative columns added.
We lastly return the data to the table, and remove the loading overlay.
Potion Maths
The callback function is already quite long, and it’s helpful to divide work into parts for things like reusability, debugging small parts, and easier maintenance of the code. While the callback function formats the input and output, and updates the table, a seperate function actually does the “maths” to calculate the possible potions. I’ve chosen to put it into the components folder as it doesn’t neatly belong anywhere else. Another options, by the way, is to put folders in the pages folder, and then put multiple scripts in those. That may be a better idea.
components/combos.py
[Some text here].
After all that effort, we choose some effects and press calculate. With any luck, the correct list of possible potions appears, nicely formatted in a presentable way. It’s funny how simple the result seems, yet how much work is required to get it to a reasonable state. It’s not just the “maths”, but the presentation, “minor” tweaks, and endless bug fixing for stuff that really should just work…
Anyway, onto the next page.
Potion Maker
Ingredient Info (WIP)
Add Ingredient