Introduction

-
The E stand for Extraction,
-
The L stands for Load,
-
So it looks like we only need, at most, three programs to get our data pipeline going, right?
If only it was that simple…
Welcome to my project on setting up a simple data pipeline using entirely open-source software. We are going to cover the installation of all the needed programs, and then configure them to take some data from a public source on the web and send it to a data analysis tool. This will focus only on locally hosted software.
The purpose of this project is partially to demonstrate my knowledge of Data Engineering, and partially as a resource for when I, inevitably, forget much of this! It is overkill for what is essentially moving a Google Sheets document into a database, once, but the principles used here can be scaled up to massive amounts of data continuously extracted with complex transformations using multiple sources and destinations.
Part 1: Installation
This is a list of all the programs we will need to install. We will need a fair amount of space, approximately 30 GBs but it would be wise to have at least 40 to 50 GBs. This is also intended for Windows 10 or 11. For Linux, you can probably just skip installing WSL and everything else will be the same. No clue for Mac, sorry!
| Program |
Purpose |
Size (approx.) |
| Anaconda |
Package manager for Python |
8 GB |
| Python |
General Purpose Language |
part of Anaconda |
| Spyder |
Python Editor |
part of Anaconda |
| WSL |
Allows Linux on Windows |
~2 GB |
| Docker |
Infrastructure |
20 GB |
| SQL |
Database |
part of docker |
| Airbyte |
The EL of ELT |
part of docker |
| SuperSet |
BI tool |
part of docker |
| Total |
|
~30 GB |
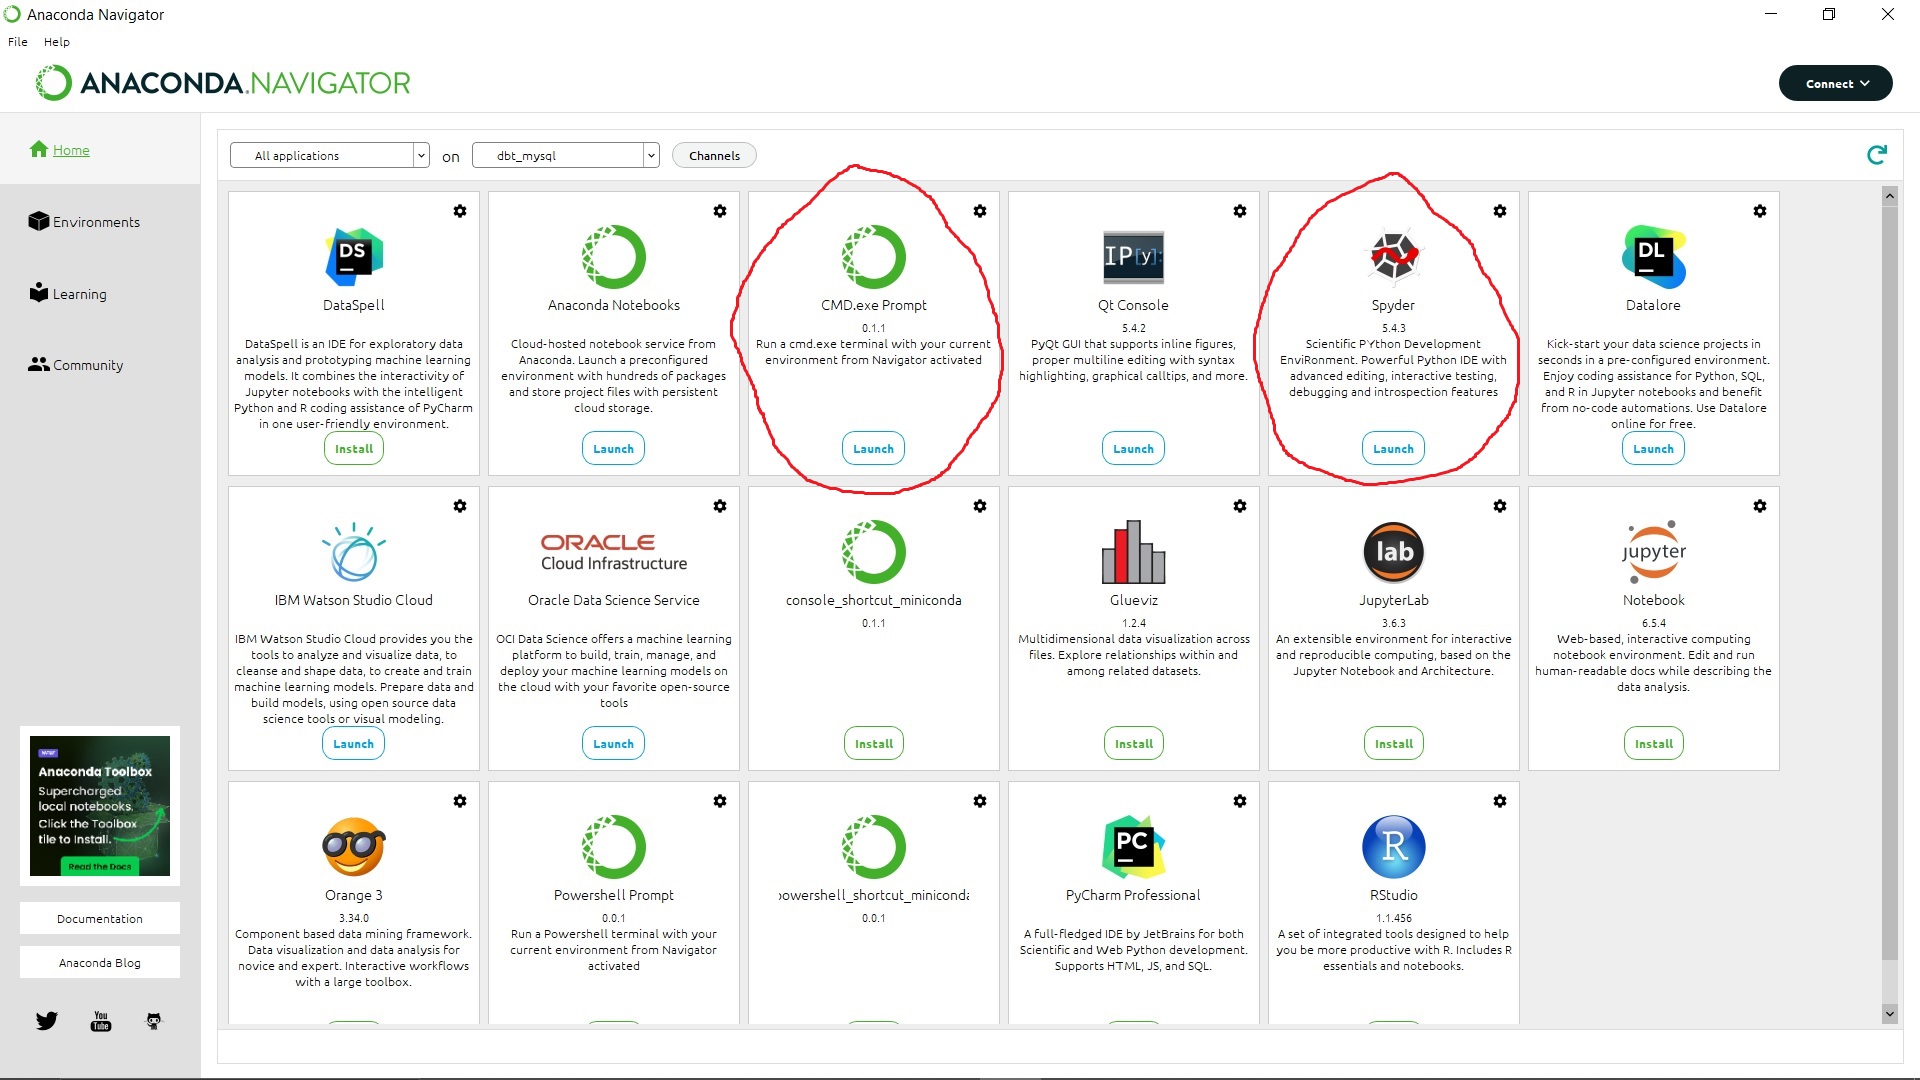
Anaconda, Python, and Spyder (and cmd)
Anacondas, and Pythons, and Spyders. Who knew programmers had a sense of humour?
What they are:
-
Python is a general purpose programming language that is used in Data Science for complex transformations of data.
-
Anaconda manages seperate Python environments so you can run multiple projects with different requirements (like python versions). Though we don’t ‘technically’ need Anaconda, it comes with a selection of programs, like Python itself, that makes installation extremely easy.
-
Spyder is an editor for Python and is where we will be actually writing code. It also comes with Anaconda.
Installation:
Go to https://www.anaconda.com/download/ to download anaconda, which includes anaconda navigator, a GUI.
We can then install Spyder, as well as the command prompt (cmd). I don’t think this is strictly needed, but it makes using the cmd easier. Otherwise, we would have to activate the Python environment from the cmd each time.
Git/Github –> OUTDATED. NOT REQUIRED
Update: After spending some time experimenting and investigating, I realised that dbt does not support python scripts for MySQL and PostgreSQL. It only supports SQL scripts via community plugins.
What they are:
-
Git is a tool that tracks changes to software, allowing you to roll-back changes, create multiple copies of software, and log why changes were made, among other things.
-
Github uses git and is a way to host repositories of code, for instance for collaboration, and is required for Airbyte to run SQL and Python files using dbt. You may also notice this webpage is running on github!
Installation:
Install git at https://git-scm.com/downloads.
You will also need to setup an account for Github at https://github.com/ if you don’t have one.
WSL 2, Linux, and Docker Desktop
What they are:
-
Windows Service for Linux (WSL) is a . . . windows service . . . for Linux. Although not for Linux, in that sense. It is a virtual machine that allows Linux to run on Windows operating systems.
-
Docker allows programs to be run in a container. Containers contains all the neccessary parts to run the programs and are lightweight compared to virtual machines. One advantage is that software can be shared between systems since the container has everything it needs to run, stand-alone. Another advantage is that it is required by several of the programs we are going to use, which sort of forces our hand.
Installation:
Install WSL using the command prompt:
wsl --install
We can then list the available distributions of Linux and select one. I chose Ubuntu.
wsl --list --online
wsl --install -d <Distribution>
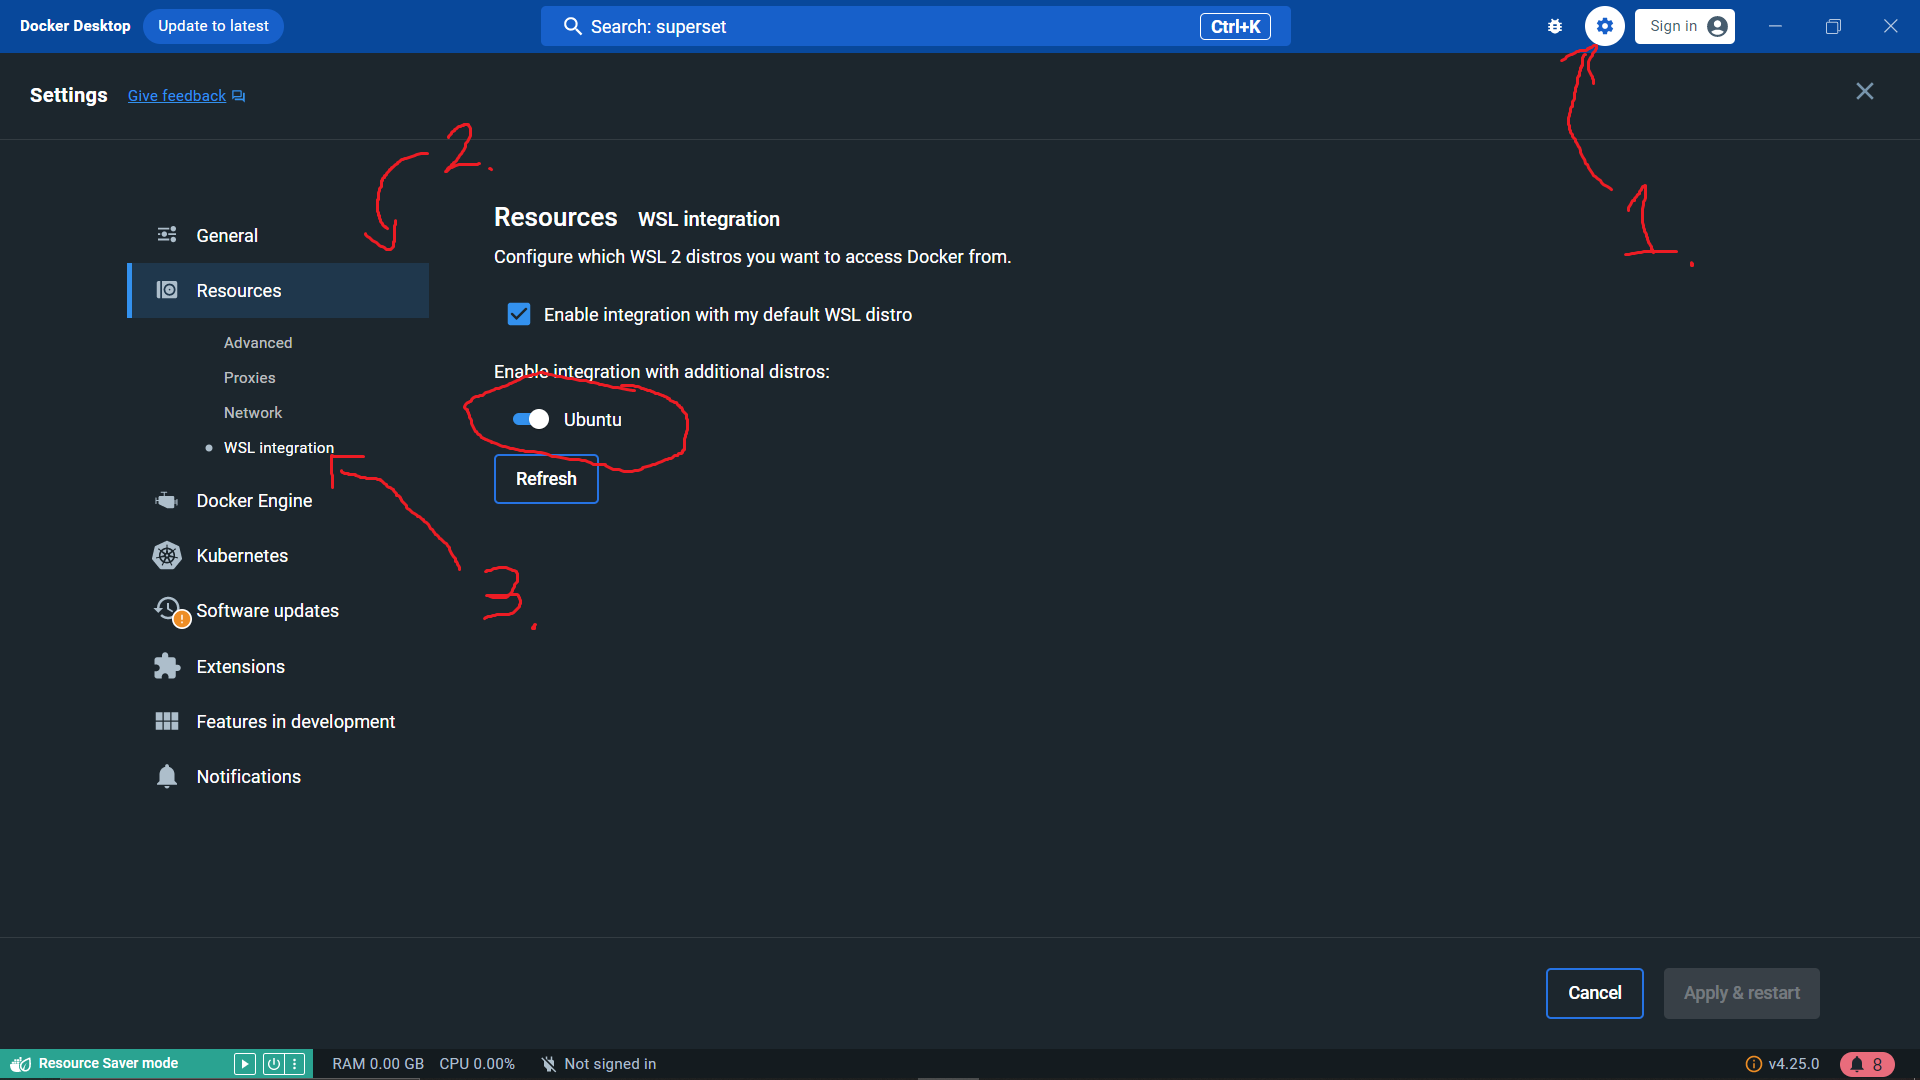
Install docker desktop at https://www.docker.com/products/docker-desktop/
Once installed, we also need to activate WSL in Docker. Navigate to Settings -> Resources -> WSL Integration and enable Ubuntu (or your chosen distribution).
SQL (MySQL/PostgreSQL)
What they are:
-
SQL is a language even more ubiquitous than Python in data science. It is a database language for relational databases (basically, data in tables). SQL and Python are the backbone of data Transformations, with SQL more limited than Python but faster and easier to use for common transformations and general database tasks.
-
MySQL and PostgreSQL are both version of SQL and databases. I’ve used both for this project and the differences are minor. You can choose either one.
Installation:
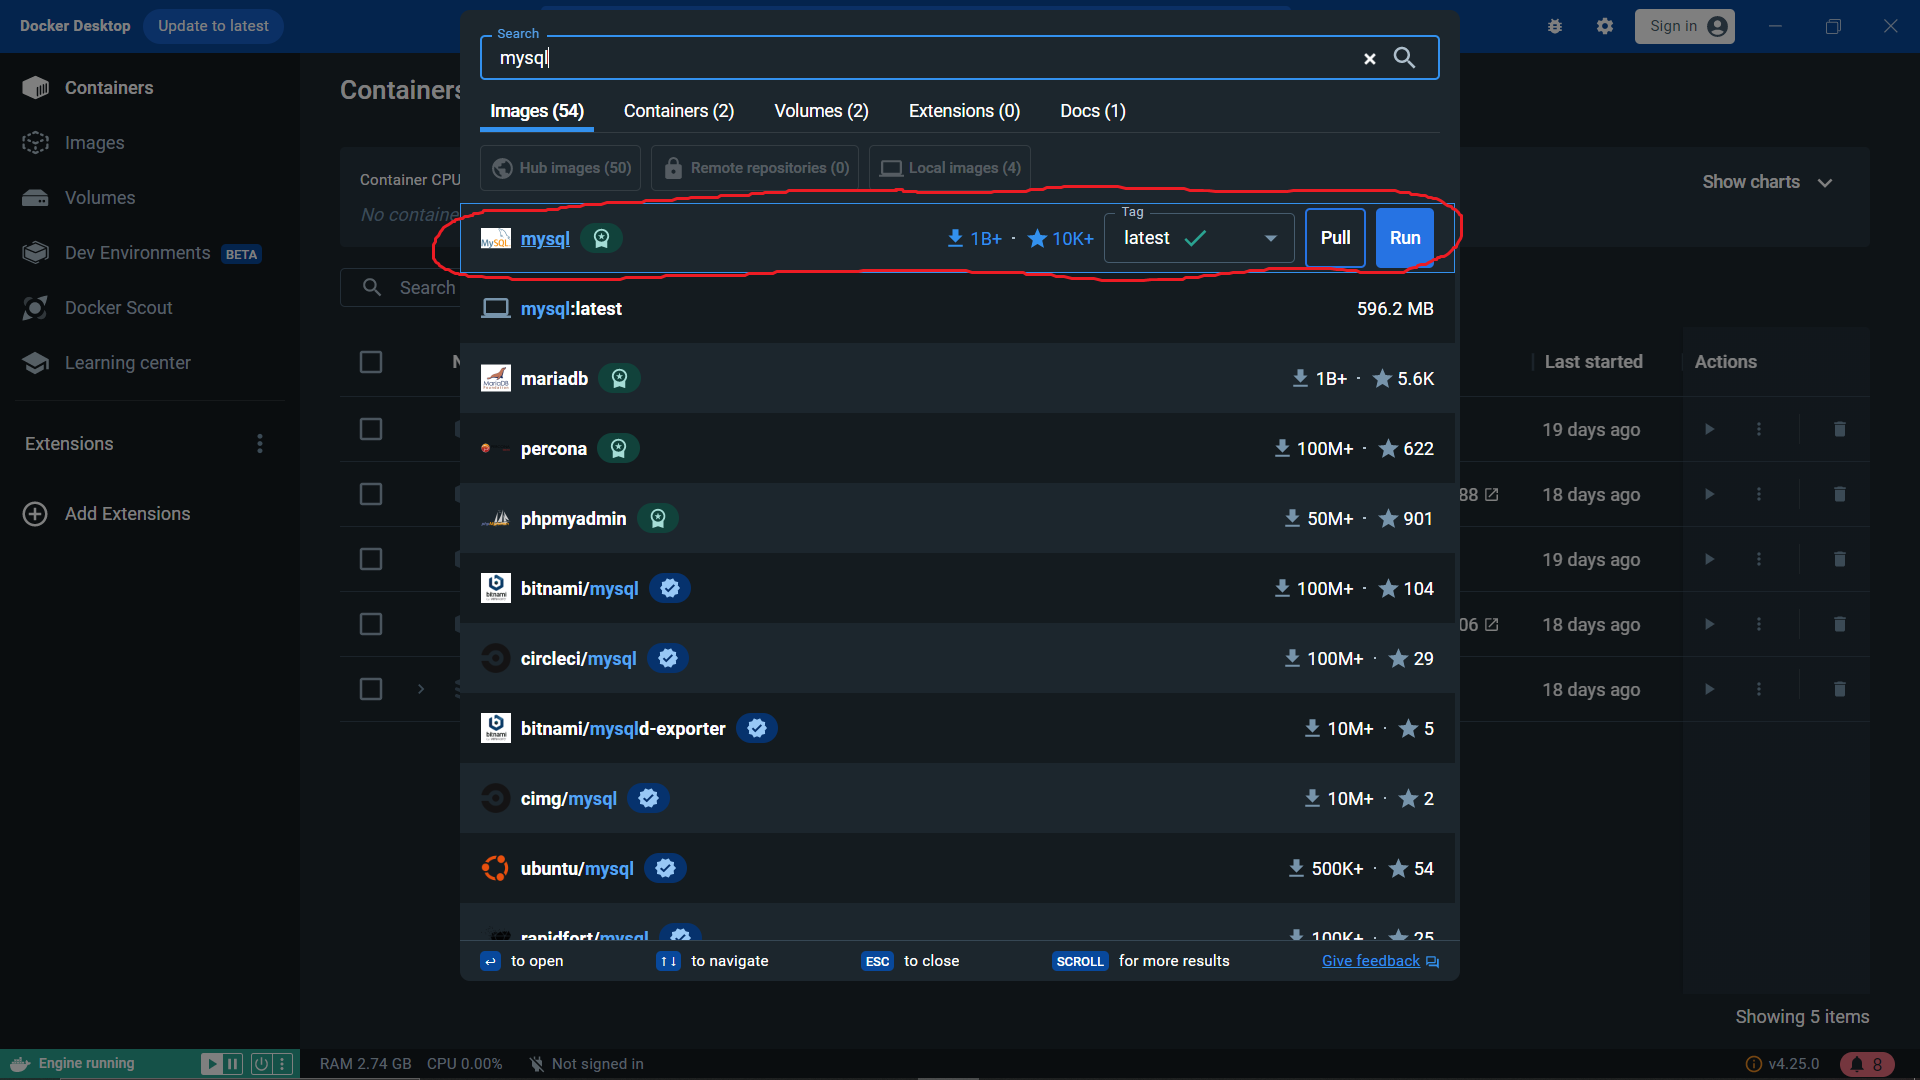
Install with Docker by typing ‘MySQL’ or ‘PostgreSQL’ in the search bar at the top, and click Pull.
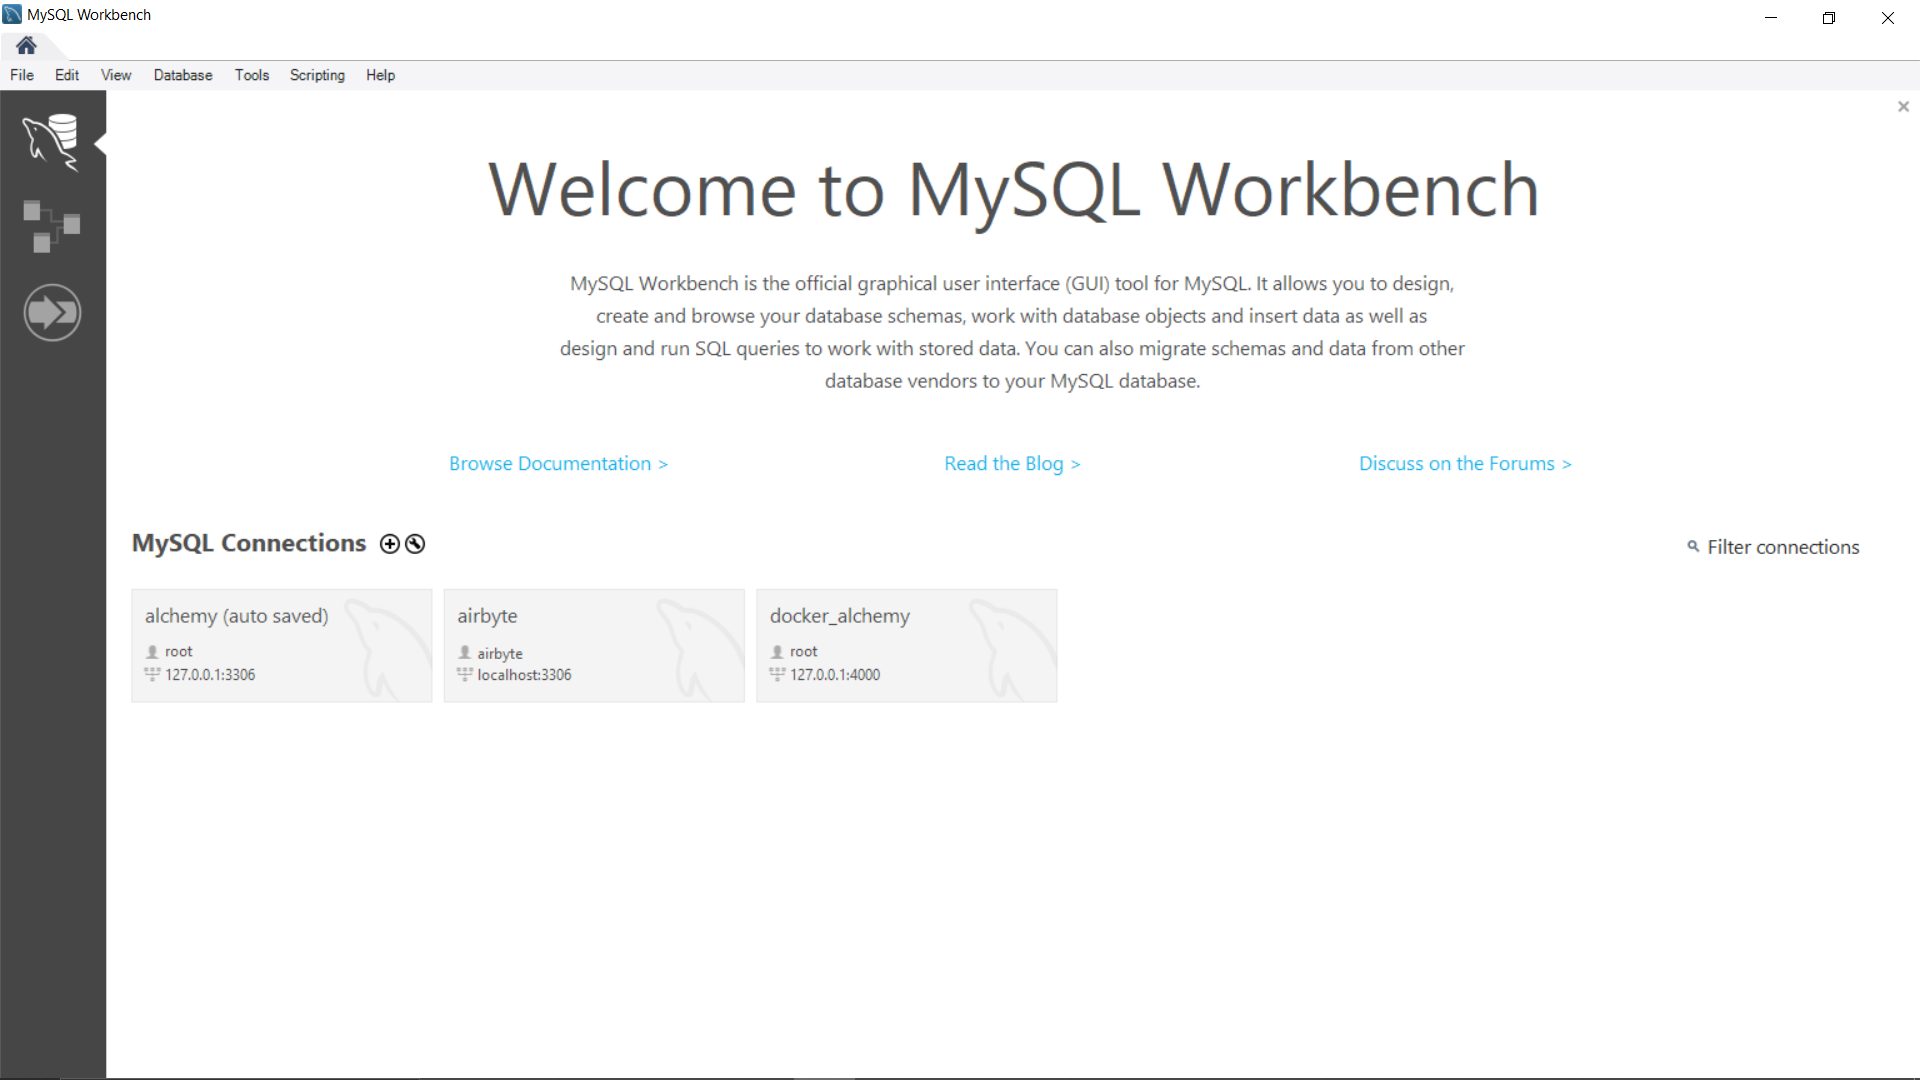
Another ‘technically’ optional program is MySQL Workshop or pgAdmin, GUIs to make SQL statements and monitor databases. You don’t need one, but it’s nice to have.
Install MySQL Workbench at https://dev.mysql.com/downloads/workbench/
Install pgAdmin4 at https://www.pgadmin.org/download/pgadmin-4-windows/
Airbyte
What it is:
Airbyte is the EL of ELT. It can take data from a Source (Like Google Sheets) to a Destination (Like our database).
Installation:
Install using the command prompt (Docker may need to be running).
git clone --depth=1 https://github.com/airbytehq/airbyte.git
cd airbyte
bash run-ab-platform.sh
You may need to navigate to the file run-ab-platform.sh and change it from Windows CRLF to Unix LF. I used notepad++ (yet another tool, I know) for this with the option in the lower right corner. If you’re interested, it’s just that Windows and Unix use different characters (CR and LF) to indicate a newline.
Go to http://localhost:8000 to see it up and running. The default credentials are:
username: airbyte
password: password
dbt –> OUTDATED. NOT NEEDED.
Update: See Git/GitHub above. I did use PostgreSQL and it has the same problems.
What it is:
Data Build Tool, the T of ELT. It allows SQL scripts to be run with ease, performing data transformations with simple SELECT statements. Airbyte uses it behind the scenes and we can use it in our transformations by reading files hosted from a Github repository. Python scripts can also be used as of dbt-core version 1.3.
Now, unfortunately, dbt-mysql (the adaptor to make dbt work with MySQL) requires an older version of dbt-core and so we cannot use Python scripts from Airbyte. If I were to redo this (and if you want to have a go) I would use PostgreSQL instead. Furthermore, the SQL script I want to use must be run after the Python script. So, we actually can’t use dbt at all.
Nevertheless, dbt is an extremely useful tool and we can still learn to use it and demonstrate its integration with Airbyte and Github. If I redo this project with PostgresSQL, I will update this section.
Installation:
Install using the command prompt from Anaconda. This will be installed locally, then we will have our files uploaded to Github for Airbyte to use.
python -m pip install dbt-mysql
We also need to install a version on docker for Airbyte to use.
docker pull ghcr.io/dbeatty10/dbt-mysql
SuperSet
What it is:
A Business Intelligence tool, similar to PowerBi, Looker, Tableau etc. It’s like all the other ones, but free!
(Yes, some of the others can be used for free as well, in varying capacities).
This tools allows us to do analytics on data. It can create dashboards with interactive graphs, allowing the creation of intuitive high and low level views of the underlying data.
Installation:
Install using the command prompt as follows:
docker run -d -p 8080:8088 -e "SUPERSET_SECRET_KEY=your_secret_key_here" --name superset apache/superset
your_secret_key_here can be replaced with anything you like. Just make sure to write it down somewhere. Security isn’t our focus here, but a secret key is required for Superset to work. Note that 8080:8088 is not a typo.
docker exec -it superset superset fab create-admin
We use this to create an account that can access Superset.
docker exec -it superset superset db upgrade
This updates Supersets database.
docker exec -it superset superset load_examples
This just loads example data and dashboards, and can be skipped if desired.
docker exec -it superset superset init
Finally, we can get up other roles beside the admin account. I am not sure if this is needed either, but it doesn’t hurt.
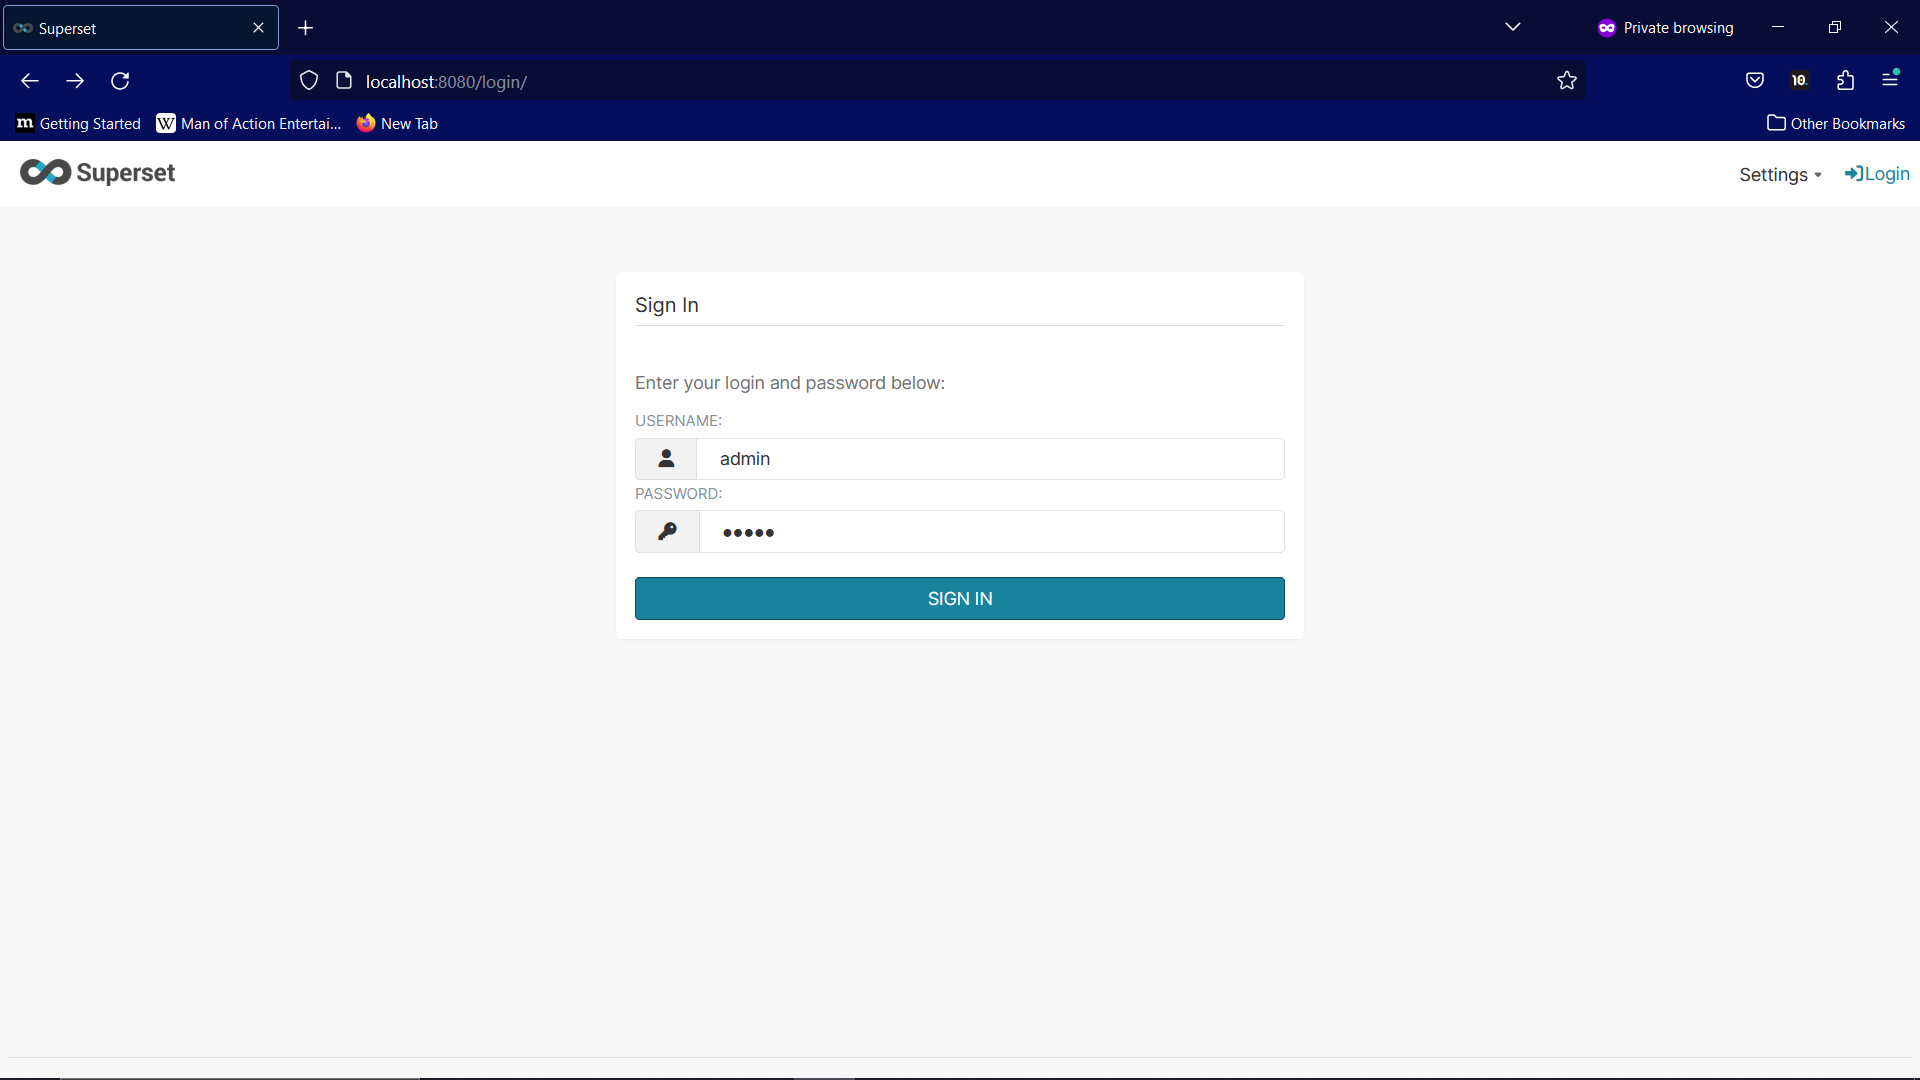
Navigate to http://localhost:8080/login/ to see Superset in action.
Part 2: Connecting Google Sheets to SQL Database
Phew. Now that everything is installed, we can begin transporting some data.
What we are about to do, in a sentence, is:
Connect a Google Sheets document to our mySQL/PostgreSQL database using Airbyte, which we will then connect to Superset for analysis, all run on Docker.
The Data:
First, we need some data. I will be using this Google Sheet. It’s a list of ingredients and their effects from Morrowind. I suggest taking a took at the data to get an idea of what it’s like. Here’s a screenshot:
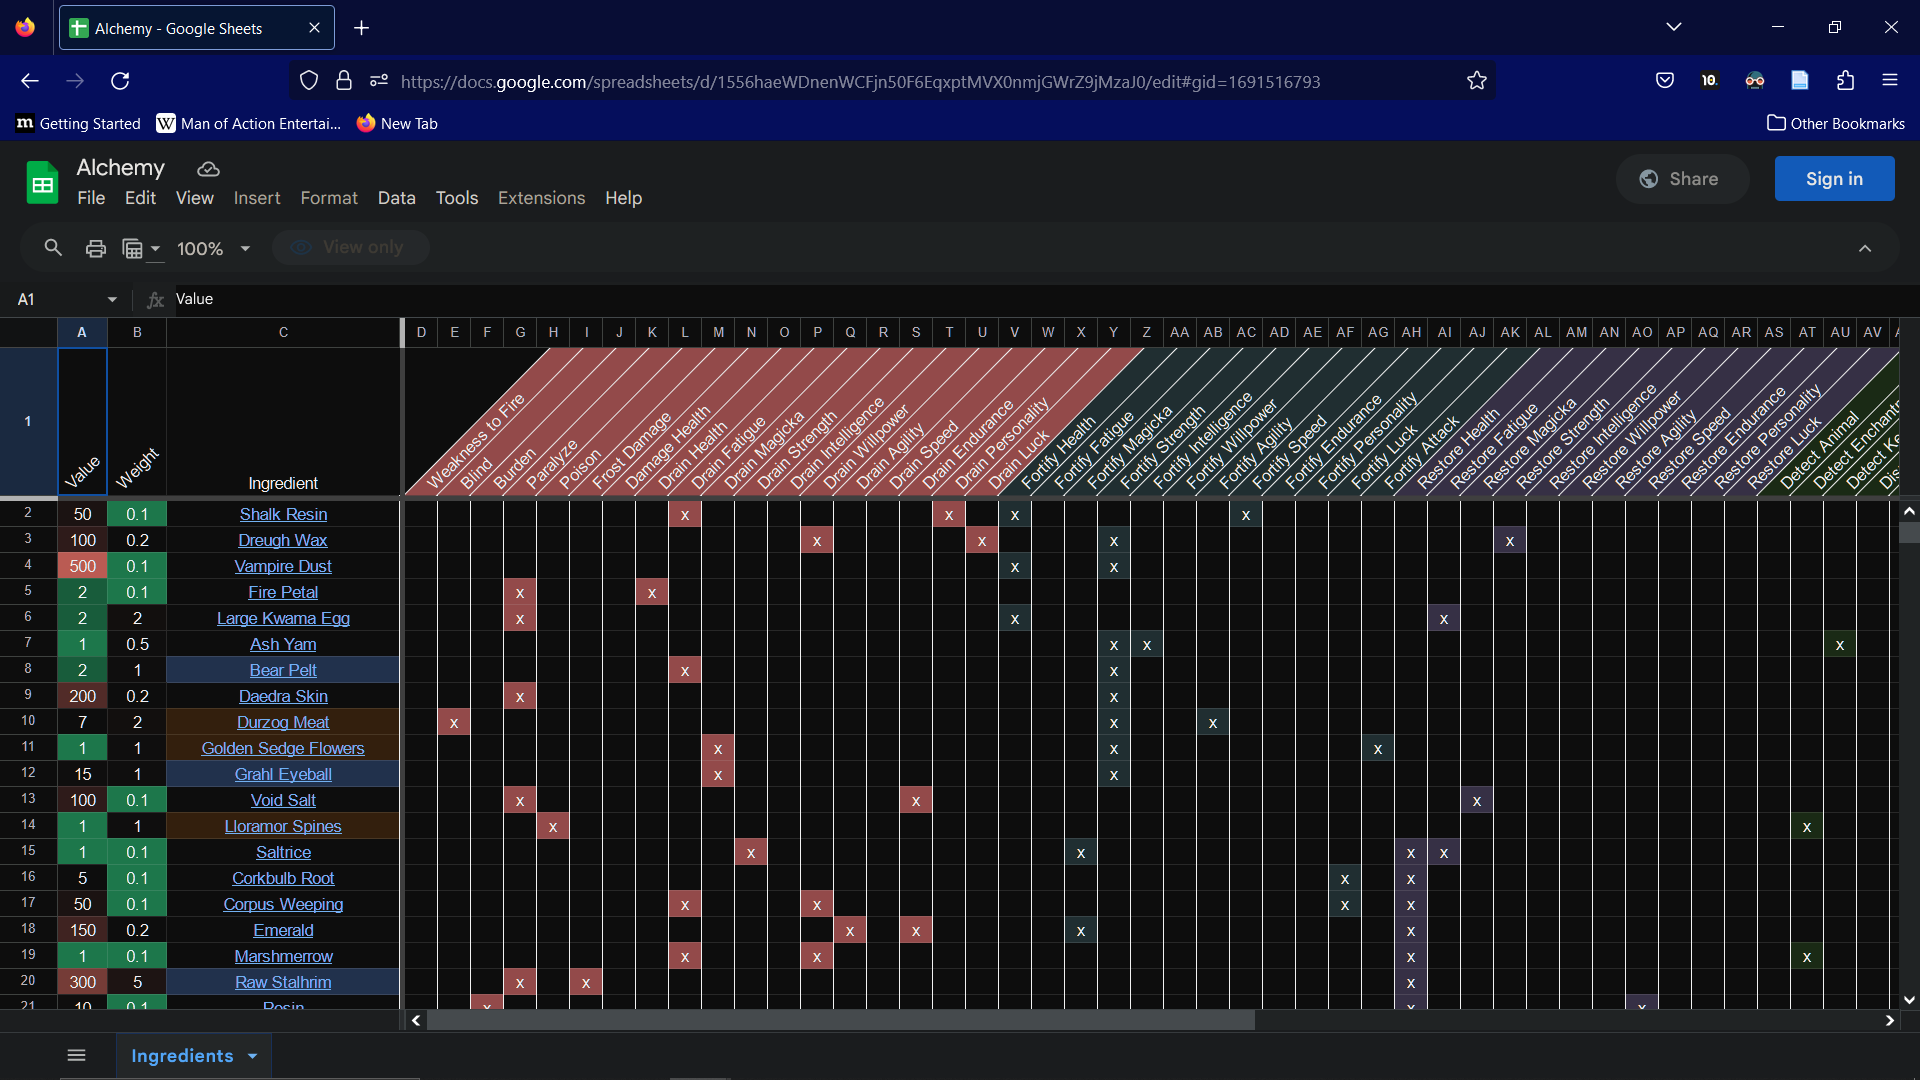
Since we only need the first tab, and Airbyte seems to not like the second tab, I copied the first tab of the Google Sheet to a version on my own account.
Next, we’ll need to set up access in Googles API. To do this, follow the instructions here:
https://docs.airbyte.com/integrations/sources/google-sheets/
Setup SQL
Start SQL in Docker and type the following in the command prompt.
For MySQL:
docker run --name <container-name> -p 3306:3306 -e MYSQL_ROOT_PASSWORD=<password> -d mysql:latest
For PostgreSQL:
docker run --name <container-name> -p 5432:5432 -e POSTGRES_PASSWORD=<password> -d postgres:latest
Write down as you will need it to access the database. The username is 'root' (MySQL) or 'postgres' (PostgreSQL).
Setup Airbyte:
Start up Airbyte in Docker and connect to it at http://localhost:8000.
Navigate to the Source tab and search for Google Sheets.
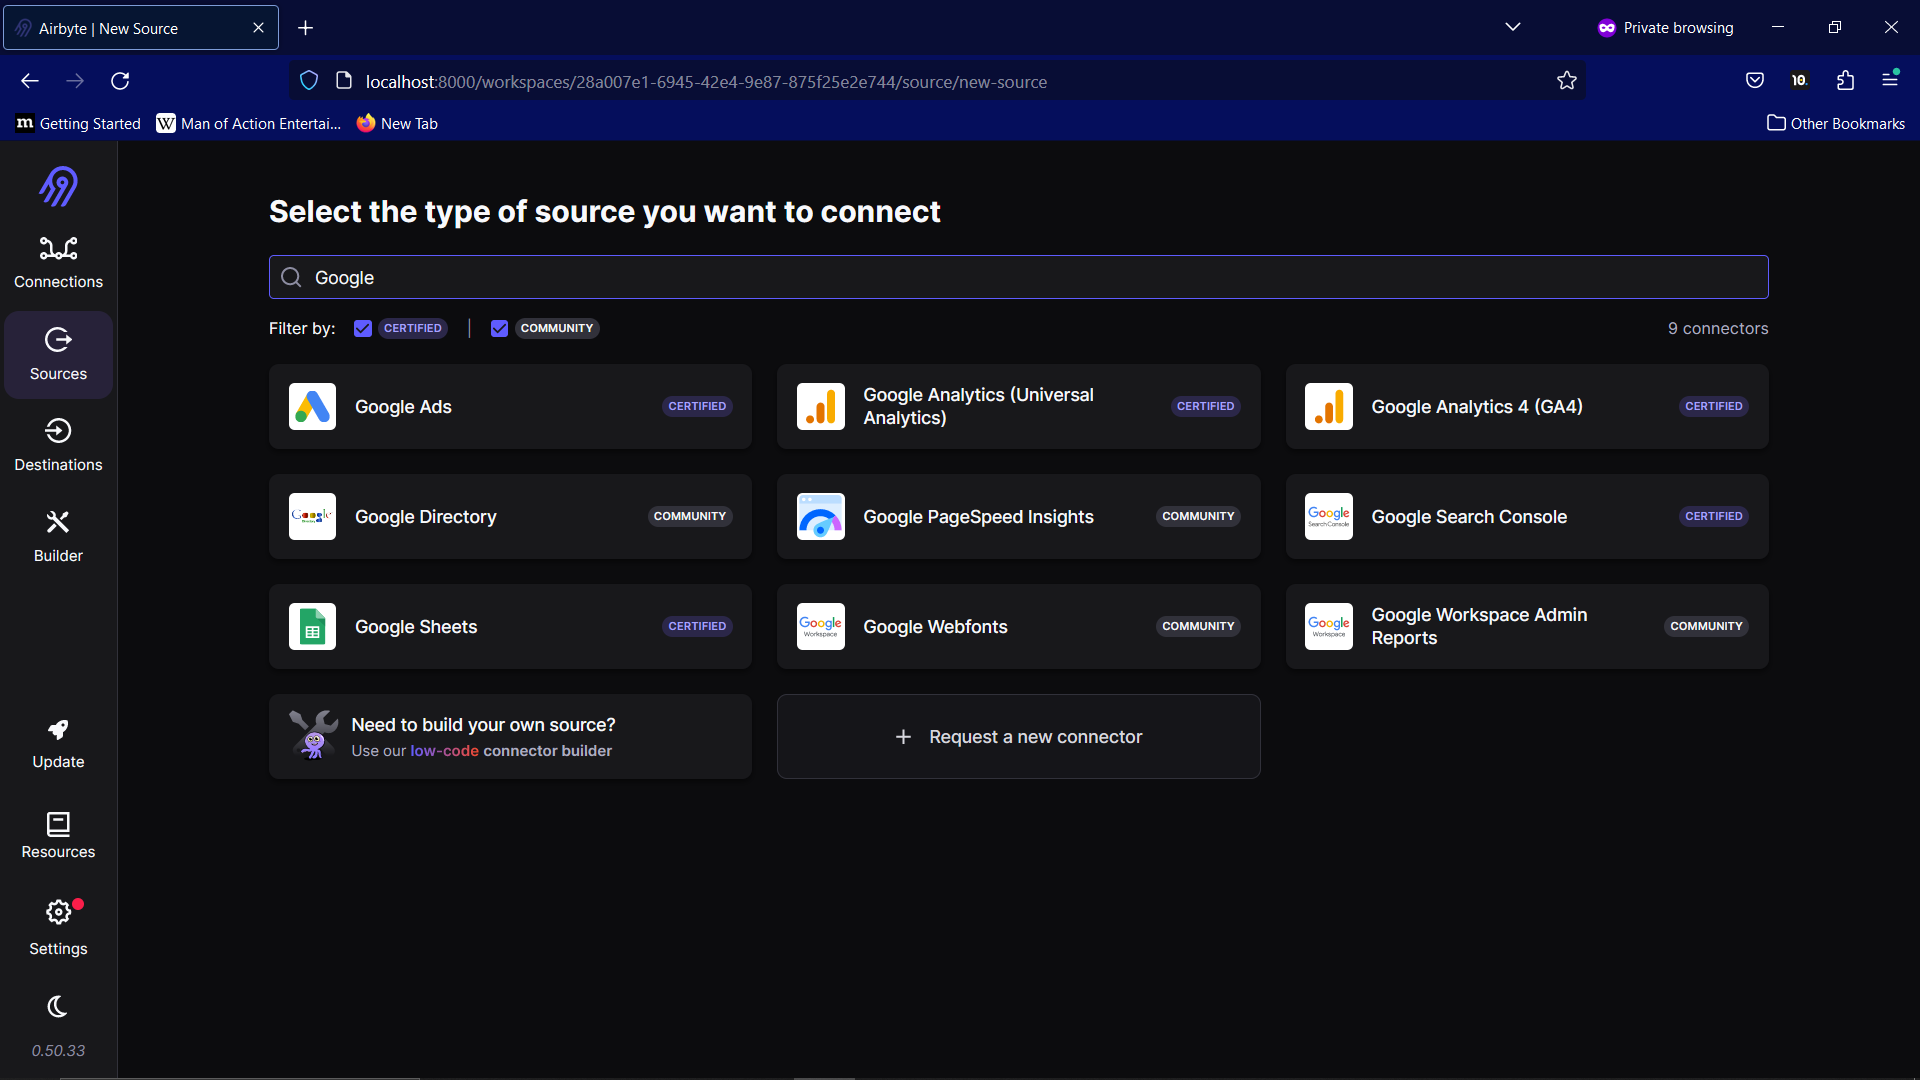
The information we need for the source is:
Source name: You can choose any name you like.
Service Account Information: You will have gotten this from the Google API. It will be in JSON format.
Spreadsheet Link: Click Share then Copy link in the spreadsheet to get this link.
Now, go to the destination tab and search for MySQL.
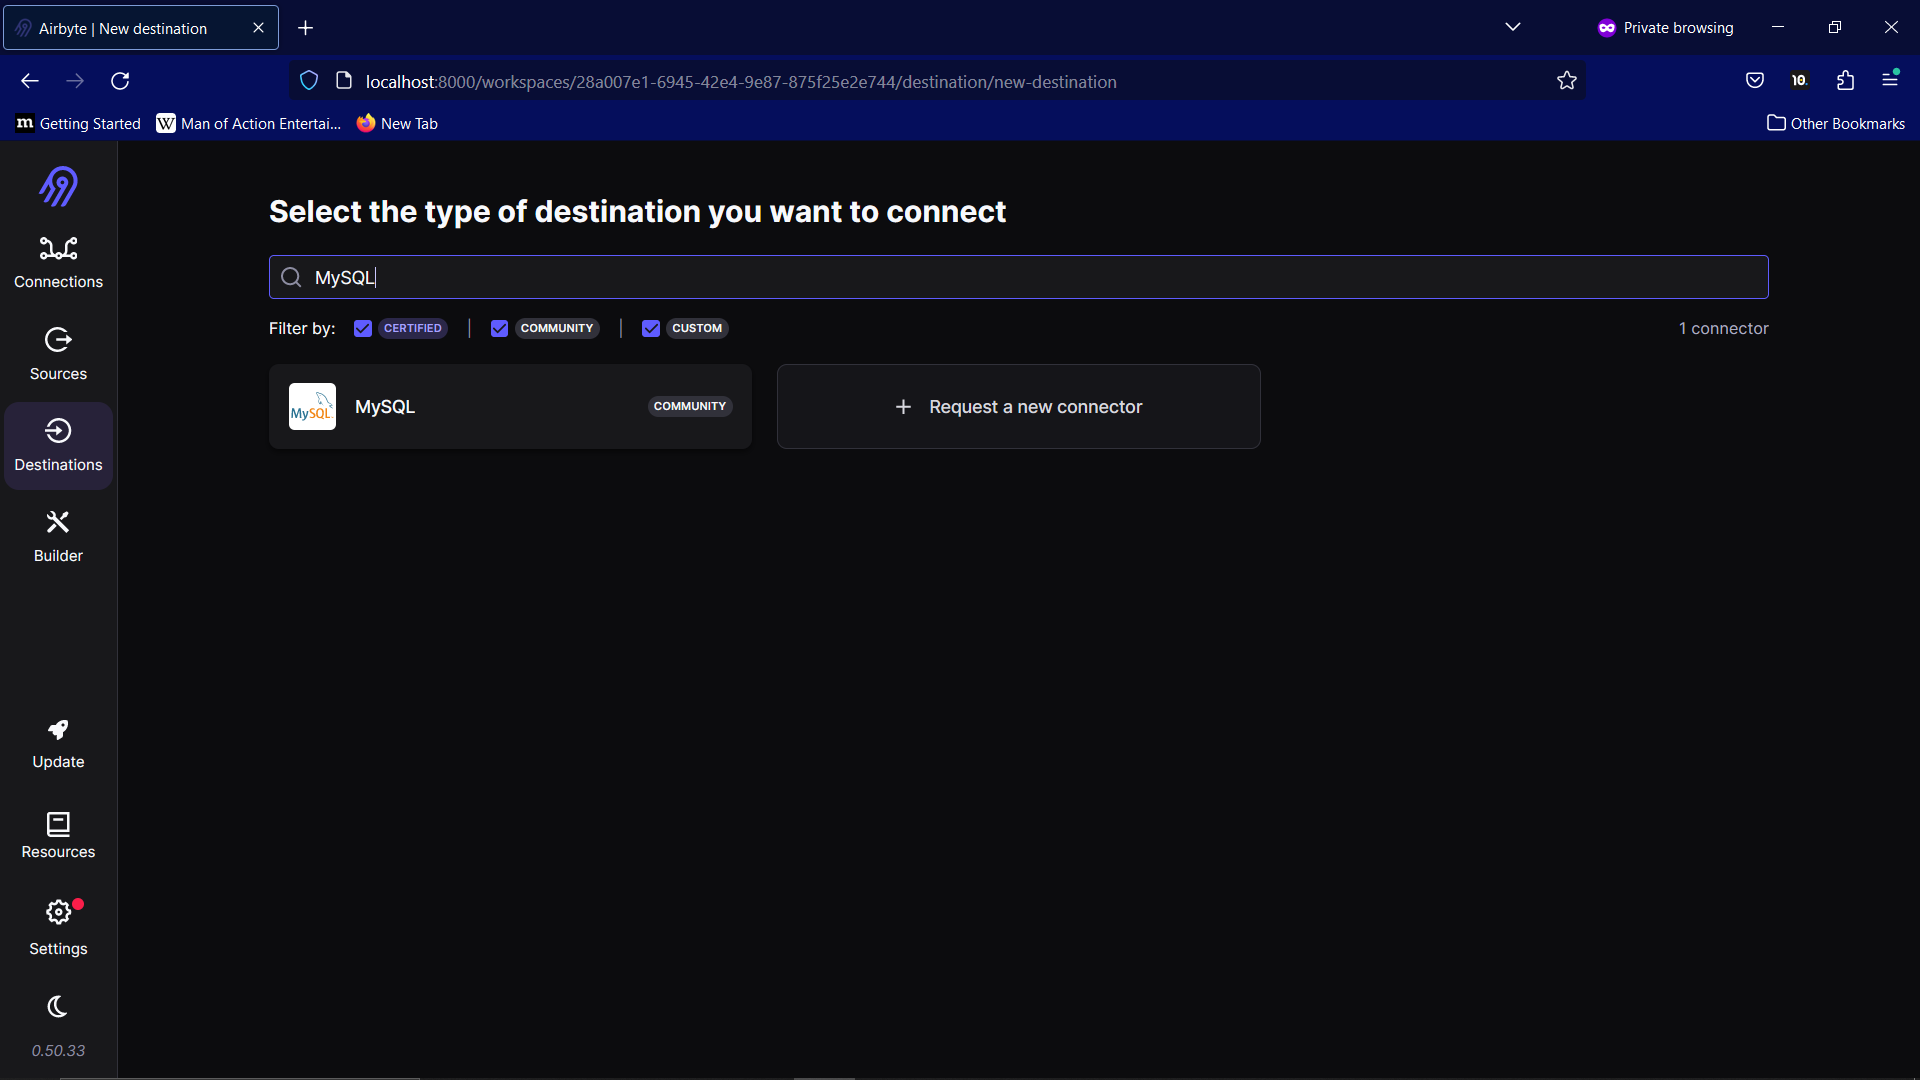
The information we need for the destination is:
Destination name: Any name you like
Host: localhost
Port: 3306 (MySQL) or 5432 (PostgreSQL)
DB Name: Name of the database
User: root (MySQL) or postgres (PostgreSQL)
In Optional fields,
Password: your password from the SQL setup
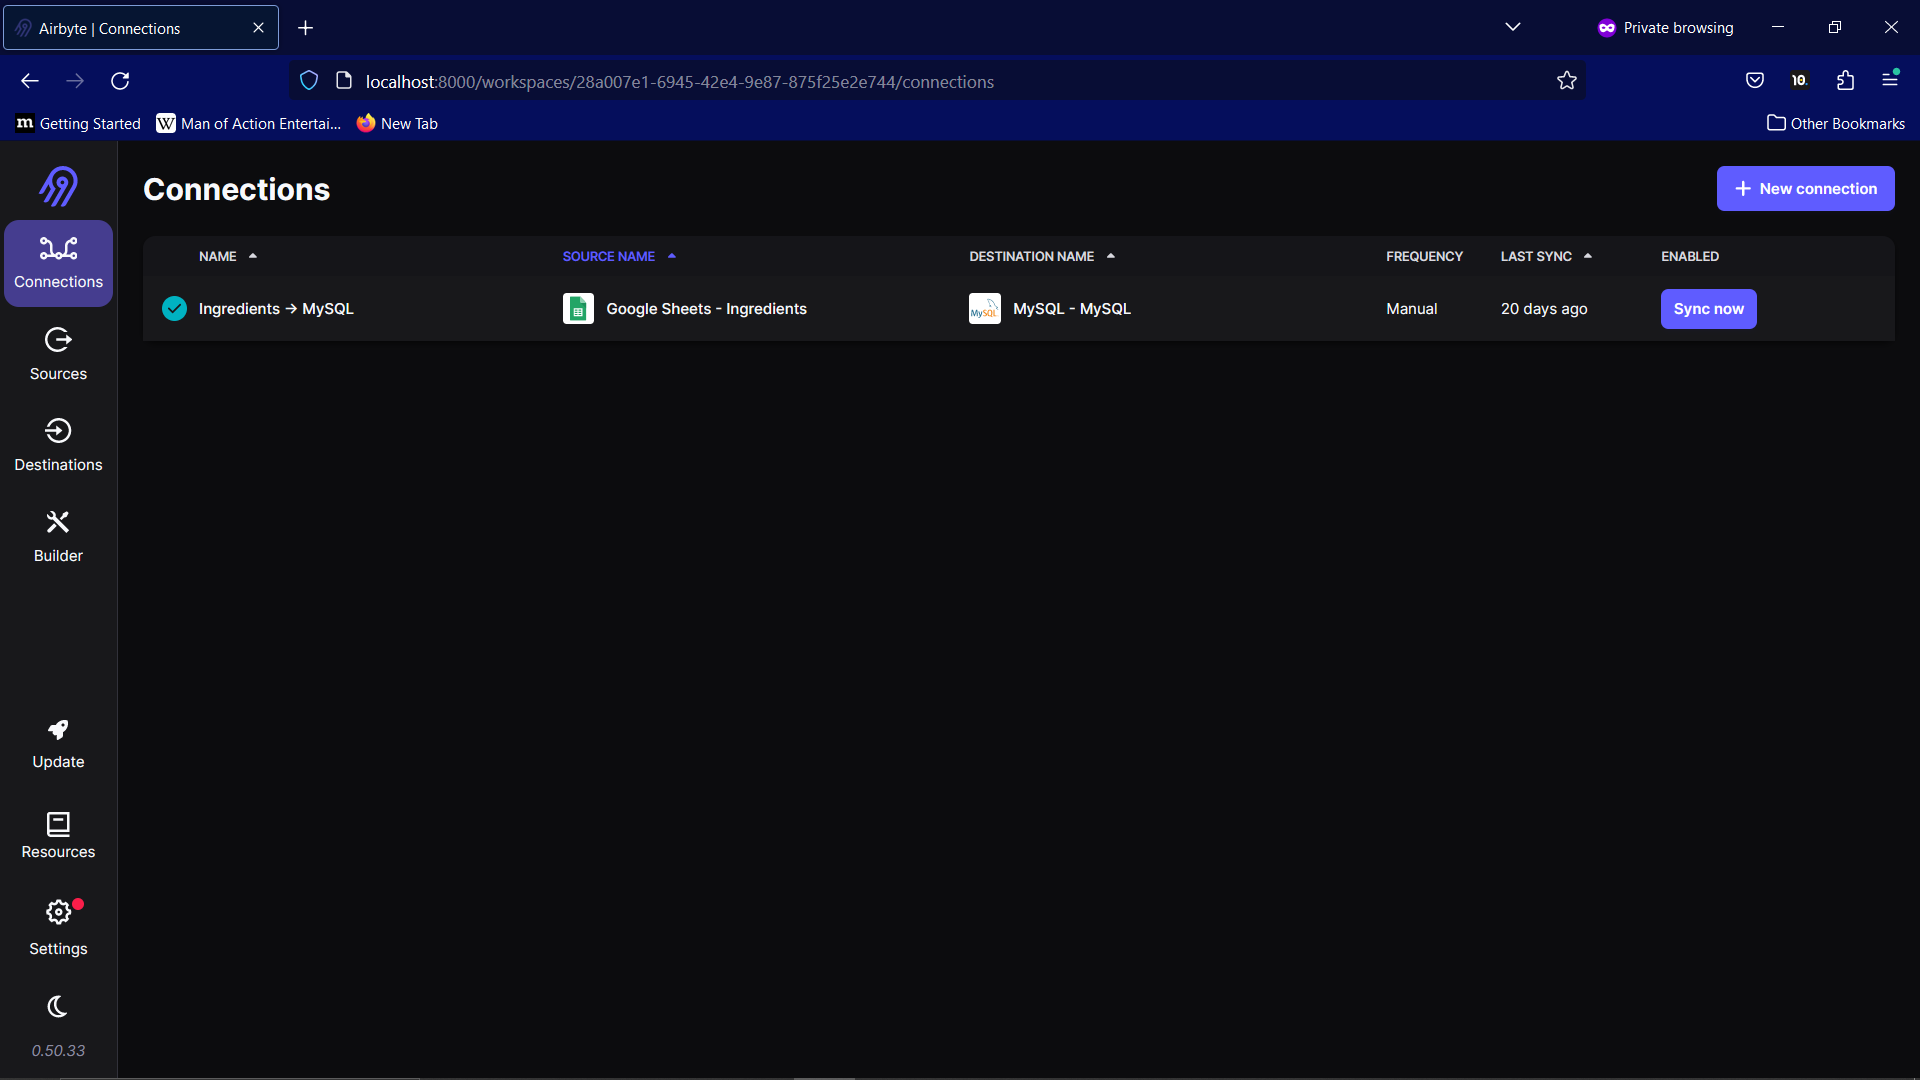
We can now, finally, move the data. Go to the Connections tab, select the Source and Destination we set up, and press Sync now. With a bit of luck, Airbyte should populate your database with the data from Google Sheets!
Setup dbt: –> OUTDATED. NOT NEEDED
All that’s left is to do some transformations, and connect our Analysis tool to the data.
However, first, let’s setup dbt just to see how it works. You can skip this step for now, but as I said earlier, I will likely redo this project to integrate the Transformations into Airbyte using dbt.
Navigate to the folder you want to save your dbt folders to. Then, from the command prompt in Anaconda, type:
dbt init <project_name>
cd <project_name>
In the file profiles.yml located in .dbt replace the contents with:
your_profile_name:
  target: dev
  outputs:
    dev:
      type: mysql
      server: localhost
      port: 3306
      schema: schema_name
      username: your_mysql_username
      password: your_mysql_password
      ssl_disabled: True
This contains the information for a connection to the database.
Replace:
-
your_profile_name with the name of your dbt folder.
-
schema_name with the name of your database.
-
your_mysql_username with your MySQL username (root if using the default admin account).
-
your_mysql_password with your MySQL password.
Use
dbt debug
to check the connection.
You can create a simple SQL script in the models folder, like
SELECT * FROM TABLE_NAME LIMIT 10
To see dbt in action. dbt will create a new table using SELECT statements.
We can now submit our dbt folder to Github as follows (You’ll first need to create a repository on Github).
git init
git branch -M main
git add .
git commit -m "Create a dbt project"
git remote add origin https://github.com/USERNAME/project_name.git
git push -u origin main
Replace USERNAME with your username.
project_name with your repositories name.
You can delete the models/example/ directory. Note that dbt run will run all files and so will run the example scripts if they are not either deleted or specific models are specified/excluded.
We can now go briefly back to Airbyte to add a transformation by navigating to our connection, pressing transformation, and entering these values:
-
Transformation name: anything you like
-
Entrypoint arguments for dbt cli to run the project: run --models <name_of_model_script>
-
Docker image URL with dbt installed: URL of dbt-mysql adaptor from docker e.g. ddb2d4049f9c
-
Git repository URL of the custom transformation project: the git repo you saved the dbt files to e.g. https://github.com/Cameron-n/alchemy-transform
The transformation should create an extra table in addition to the raw data, so you dont have to remove it, but it might be a good idea regardless.
Note, newer versions of dbt use --select instead of --models. We are intentionally using an older version due to using the dbt-mysql adaptor.
You’ll need to install SQLalchemy and pymysql using python -m pip install sqlalchemy and python -m pip install pymysql from the command prompt in Anaconda. These are libraries used to connect to the database. It is by pure, entertaining, coincidence that Alchemy is the mixing of ingredients in Morrowind, and also the name of the SQL library. This will include using pandas which I will not explain in detail.
We are going to use the following Python script:
# MySQL python transformation

from sqlalchemy import create_engine

import pymysql

import pandas as pd


# Setup connection. CHANGE <database_password> TO YOUR PASSWORD
sqlEngine       = create_engine('mysql+pymysql://root:<database_password>@127.0.0.1:3306/alchemy', pool_recycle=3600)     #MySQL
# OR
sqlEngine       = create_engine('postgresql://postgres:<database_password>d@localhost:5432/postgres', pool_recycle=3600)  #PostgreSQL
dbConnection    = sqlEngine.connect()

# Create dataframe. CHANGE <database_name>.<database_table> TO YOUR VALUES
frame           = pd.read_sql("select * from <database_name>.<database_table>", dbConnection);

# I don't know what this does
pd.set_option('display.expand_frame_repr', False)

# Remove unneeded columns. We don't need 'value' or 'weight' or Airbyte's additional data.
frame.drop('value', axis=1, inplace=True)
frame.drop('weight', axis=1, inplace=True)
frame.drop('_airbyte_ab_id', axis=1, inplace=True)
frame.drop('_airbyte_emitted_at', axis=1, inplace=True)
frame.drop('_airbyte_normalized_at', axis=1, inplace=True)
frame.drop('_airbyte_ingredients_hashid', axis=1, inplace=True)

# Replace None (blank spaces) with 0 and 'x' with 1. This allows us to do some maths
frame = frame.replace([None,'x'],[0,1])

# Create new reshaped dataframe for output. We change the data's format to
# Ingredients, effect 1, effect 2, effect 3, effect 4
# This works as each ingredient has up to 4 effects
final_frame=pd.DataFrame(columns=['ingredients','effect 1','effect 2','effect 3','effect 4'])

# This creates each row of the table, searching each original row for 1's and
# adding those effects
for row in range(len(frame.index)):
    new_row = [frame['ingredient'][row]]
    column_number = 0
    for value in frame.iloc[row]:
        if value == 1:
            new_row.append(frame.columns[column_number])
        column_number += 1
    while len(new_row) < 5:
        new_row.append("")
    final_frame.loc[row] = new_row

# Name of new table to create
tableName = "<new_table_name>"

try:

    final_frame           = final_frame.to_sql(tableName, dbConnection, if_exists='fail');

except ValueError as vx:

    print(vx)

except Exception as ex:

    print(ex)

else:

    print("Table %s created successfully."%tableName);

finally:

    dbConnection.close()
You can copy the above into Spyder and run it with the database running in Docker. Hopefully, you should see a new table created if you look in Workbench/pgAdmin4, or later in Superset.
We now want to create a new table from the table we created using Python. We’ll do this with SQL since it’s a simpler transformation (a join). This script creates all possible pairs of ingredients where at least one effect matches, contains no duplicates, and where any single ingredient cannot combine with itself.
Note, in dbt we don’t need the CREATE statement as dbt uses the SELECT statement to construct a new table
For MySQL:
CREATE TABLE ingredient_pairs AS
SELECT t1.ingredients AS t1ing,t2.ingredients AS t2ing,
t1.`effect 1` AS t1e1, t1.`effect 2` AS t1e2, t1.`effect 3` AS t1e3, t1.`effect 4` AS t1e4,
t2.`effect 1` AS t2e1, t2.`effect 2` AS t2e2, t2.`effect 3` AS t2e3, t2.`effect 4` AS t2e4
FROM
(
ingredients_final t1, ingredients_final t2
)
WHERE t1.ingredients < t2.ingredients
AND (
   t1.`effect 1` IN (t2.`effect 1`,t2.`effect 2`,t2.`effect 3`,t2.`effect 4`) AND t1.`effect 1` != ''
OR t1.`effect 2` IN (t2.`effect 1`,t2.`effect 2`,t2.`effect 3`,t2.`effect 4`) AND t1.`effect 2` != ''
OR t1.`effect 3` IN (t2.`effect 1`,t2.`effect 2`,t2.`effect 3`,t2.`effect 4`) AND t1.`effect 3` != ''
OR t1.`effect 4` IN (t2.`effect 1`,t2.`effect 2`,t2.`effect 3`,t2.`effect 4`) AND t1.`effect 4` != ''
)
For PostgreSQL:
CREATE TABLE ingredient_pairs AS
SELECT t1.ingredient AS t1ing,t2.ingredient AS t2ing,
t1."effect 1" AS t1e1, t1."effect 2" AS t1e2, t1."effect 3" AS t1e3, t1."effect 4" AS t1e4,
t2."effect 1" AS t2e1, t2."effect 2" AS t2e2, t2."effect 3" AS t2e3, t2."effect 4" AS t2e4
FROM
(
ingredients t1, ingredients t2
)
WHERE t1.ingredient < t2.ingredient
AND (
   t1."effect 1" IN (t2."effect 1",t2."effect 2",t2."effect 3",t2."effect 4") AND t1."effect 1" != ''
OR t1."effect 2" IN (t2."effect 1",t2."effect 2",t2."effect 3",t2."effect 4") AND t1."effect 2" != ''
OR t1."effect 3" IN (t2."effect 1",t2."effect 2",t2."effect 3",t2."effect 4") AND t1."effect 3" != ''
OR t1."effect 4" IN (t2."effect 1",t2."effect 2",t2."effect 3",t2."effect 4") AND t1."effect 4" != ''
)
You can run this from Workbench/pgAdmin4, using dbt, or the shell if you know how.
We now have a dataset we can connect to Superset for analysis.
Setup Superset
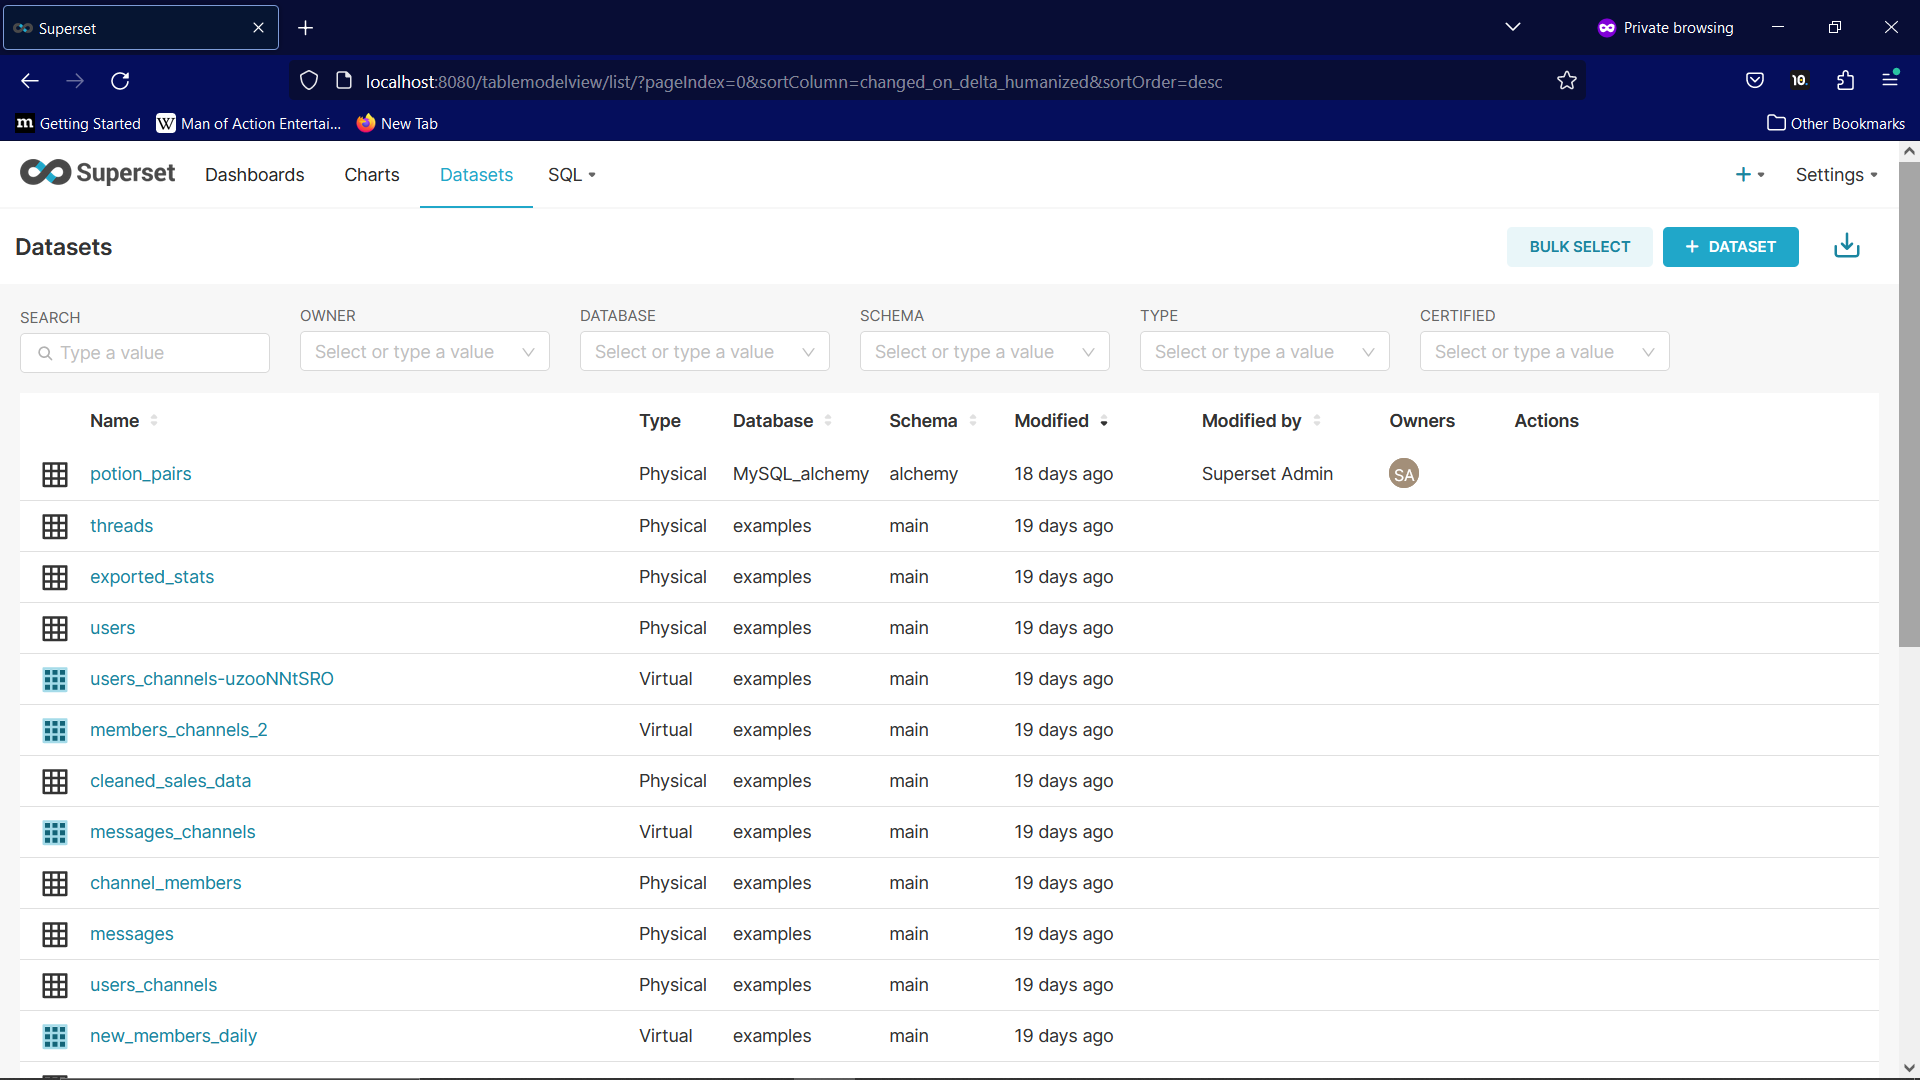
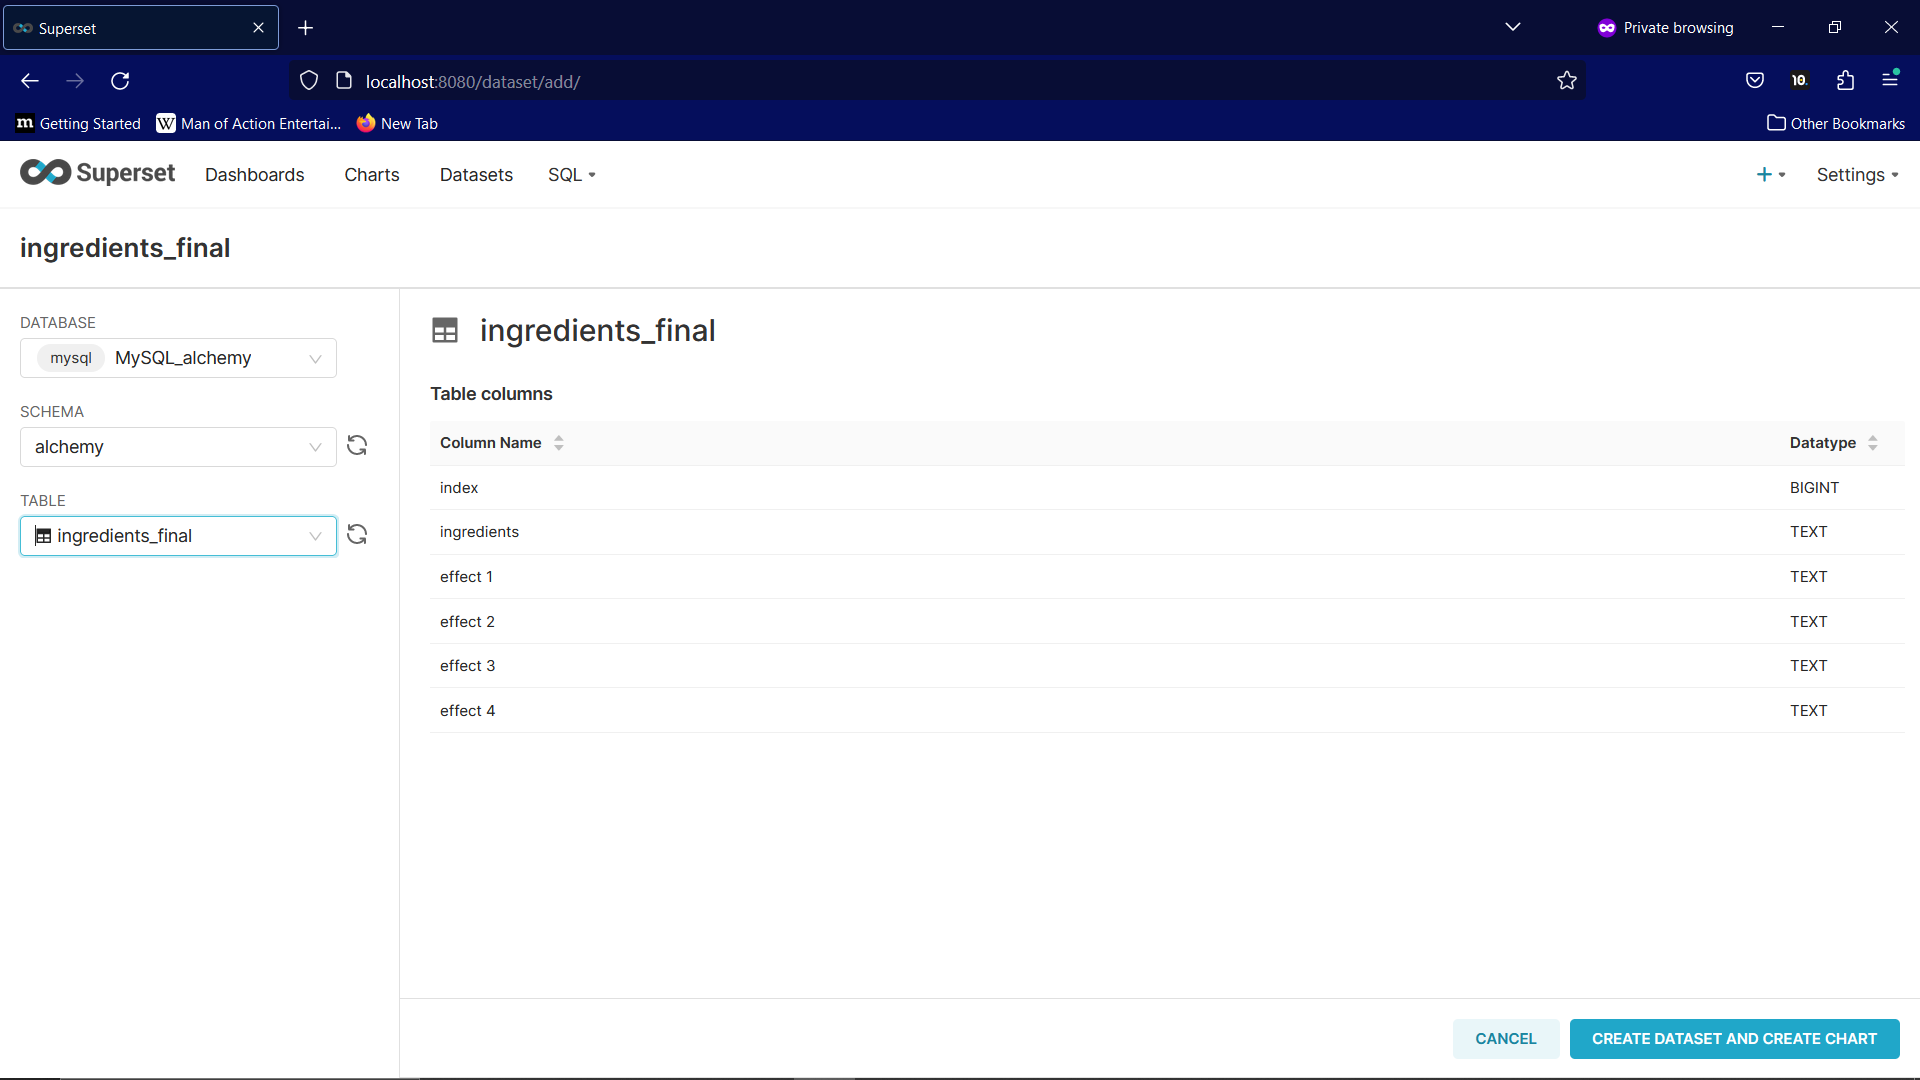
Start Superset in Docker. Navigate to datasets and select the database, schema, and table.
To the analysis and beyond!
And that’s that. Easy…
If all went according to plan, you should now have a working data pipeline that brings data from a Source to a Destination, and Transforms it in the Database, ready to get Analysed.
This literally is the beginning. It’s a basic infrastructure that can be expanded upon in enourmous ways, from security, sources, and destinations, to the cloud, schedualing, and beyond.
But, enough for now.
Next time, we will do the actual analysis, which will require some more SQL as well as the scope of what problem(s) we are trying to solve. And a (less than) fancy dashboard in SuperSet.
I hope to see you then.